Tutorial: Getting Started with Cloud Foundry - Part 1/3
Monday July 23, 2012 , 6 min Read

Why Cloud Foundry?
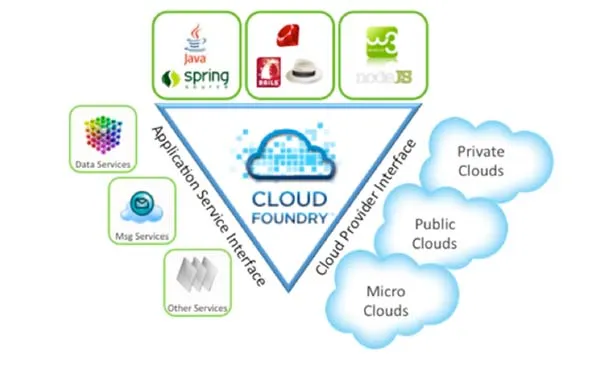
Cloud Foundry is an interesting choice for developers targeting the Cloud. As an Open PaaS, Cloud Foundry offers the flexibility to run it on a VM, Private Cloud or the Public Cloud. This makes it easy for the businesses to unify its development environment across the enterprise, 3rd party hosting and Public Clouds. Developers can package the application for Cloud Foundry and run it in a single VM, Private Cloud running behind the firewall of an organization or a Public Cloud like Amazon EC2 without worrying about the scalability of the infrastructure. The other benefit of Cloud Foundry is the choice of available runtimes, frameworks and languages. Cloud Foundry supports Java, Ruby and Node.js runtimes along with grails, spring, rack, sinatra, rails, node, lift and play frameworks. Developers using any of these environments can easily deploy the applications to Cloud Foundry. Contemporary applications rely on relational databases, NoSQL databases and messaging infrastructure for achieving the internet scale. Cloud Foundry exposes MySQL, PostgreSQL, MongoDB, RabbitMQ and Redis as services that offer the database and messaging capabilities. Developers can easily bind the applications to one of these services during the deployment. Apart from these core services, various language, platform and hosting partners extended Cloud Foundry to support additional languages, frameworks, services and deployment options.

What to Expect from this tutorial?
There are many tutorials and getting started guides including the official documentation of Cloud Foundry. This tutorial is focused on understanding the deployment choices of Cloud Foundryby targeting the VMware hosted CloudFoundry.com and Micro Cloud Foundry that runs as a VM. We will learn how to setup and configure Micro Cloud Foundry in two modes – 1) Offline and, 2) Online. Offline mode enables developers to easily deploy applications on the Micro Cloud Foundry without the internet connection. Online mode is primarily meant to expose the applications deployed on the Micro Cloud Foundry through a publicly accessible URL while still running it within the VM. Finally, we will deploy the application on the Public Cloud running at CloudFoundry.com. Since the core objective of the tutorial is to understand the deployment options, we will keep the code simple by writing a Ruby application with just a few lines. While the tutorial is helpful in setting up Cloud Foundry environment on any OS, it shows how to configure Micro Cloud Foundry specifically on Windows 7.
Prerequisites for the Tutorial
1) Active account created at www.cloudfoundry.com - Signing up is easy and you should get your credentials in just a few minutes.
2) Download and install VMware Player – This is required to run the Micro Cloud Foundry VM. VMware makes it available for free.
3) Download Micro Cloud Foundry – Once you have an active account, you can login to download the VM that is configured to run the Micro Cloud Foundry.
4) Download Ruby for Windows – We need this for the VMC client and also to write the sample application to deploy on Cloud Foundry. Install and configure it to make sure you are able to run Ruby code on your machine.
Step 1 – Configure Micro Cloud Foundry for Offline Deployment
Before you get started, make sure that you have downloaded, installed the VMware Player and unzipped the Micro Cloud Foundry VM on your machine.
Launch VMware Player and click on Open a Virtual Machine. Point to the path where you expanded the Micro Cloud Foundry zip file.


Once the VM is opened within the VMware player, click on the Play Virtual Machine

You should see the below screen after booting the VM. Press ‘1’ to select configure.

Register a password by entering it twice.

Select DHCP in the next option and choose none for the HTTP proxy. Enter an offline domain name that will uniquely identify the offline endpoint to deploy applications. This can be anything but it is a good idea to have a domain name that looks like your-firstname.cloudfoundry.offline.

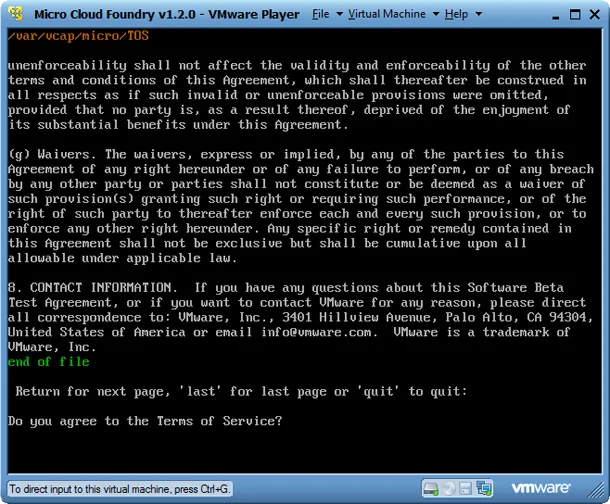
In the next step, enter your email id and accept the Terms of Service.

Micro Cloud Foundry may take a while to get installed and configured. Give it a few minutes.


If everything goes well, the installation should get completed to show the following screen

We have one more step to go before we are done. Open Network Connections in Control Panel on Windows 7 to change the DNS settings of VMware Network Adapter VMnet8. Set the Preferred DNS server address to the IP address that the Micro Cloud Foundry is currently listening on. In my case it was 192.168.190.130.


Let’s test if the DNS name is accessible to the host machine by pinging the DNS name of the Micro Cloud Foundry VM.

Congratulations! Micro Cloud Foundry is all set for the deployments.
Step 2 – Creating and deploying a simple Ruby Application
Open your favorite editor and write the following code. Create a directory called hello and save the file as hello.rb.
[crayon lang="ruby"]
require 'rubygems'
require 'sinatra'
get '/' do
"Hello from Cloud Foundry"
end
[/crayon]

Now that we have the code and the platform ready, it is time for us to configure the tools to deploy our first application on Cloud Foundry. To do this, we need to install the vmc gem on our machine. Open Command Prompt and run
[crayon lang="shell"]
gem install vmc
[/crayon]

Let’s test the VMC installation by running the vmc –v command. This should show the version of the client.
[crayon lang="shell"]
vmc –v
[/crayon]

Now, it is time for us to deploy our application to the Micro Cloud Foundry. We start this process by pointing vmc to the Micro Cloud Foundry. Let’s run the following command. Don’t forget to replace this with the actual endpoint that the Micro Cloud Foundry is listening on. You can refer to the console to get the URI.
[crayon lang="shell"]
vmc target http://api.janakiramm.cloudfoundry.offline
[/crayon]

If everything is fine, you should see a message that vmc is successfully targeting the Micro Cloud Foundry.
We need to register a new user who can deploy applications. This is different from the VCAP user that was created on the VM. The user is identified by the email address and password.
Let’s run the following command to create a new user. Do remember the password you enter during the creation.
[crayon lang="shell"]
vmc register
[/crayon]

VMC has created a new user and automatically logged him into the Micro Cloud Foundry environment. With all the prerequisites met, it is time for us to push the code. We will do this by running the following command. Make sure you are in the hello directory that contains the hello.rb file.
[crayon lang="shell"]
vmc push
[/crayon]
Give a name to your application and accept the defaults where possible.

Congratulations! You have successfully deployed your first application on Cloud Foundry! Let’s go ahead and access this application. Open browser and type the URL of the Micro Cloud Foundry.

In the next part, we will see how to take Micro Cloud Foundry online to access the deployed applications from a publicly accessible URL. Stay tuned!
- Janakiram MSV, Chief Editor, CloudStory.in


