How much does it cost to build an awesome office? A startup experience
Recently we shared how we successfully raised $632k in our first round of funding. Continuing in the same vein we reveal how we went about setting up our new office.
Right from the choice of the location to which motivational posters we’ve put up on our walls.
Why share this? Because no one else does. If someone before us had, then that information and experience would have been immensely helpful to us. It would have at least given us a heads up on what to expect and which areas to tread carefully or pay special attention to.
Fun fact: All the pictures in this post were taken with smartphones, because some of us took this task as a challenge. However, our amateur photography skills are in no way a reflection of our product’s competency :
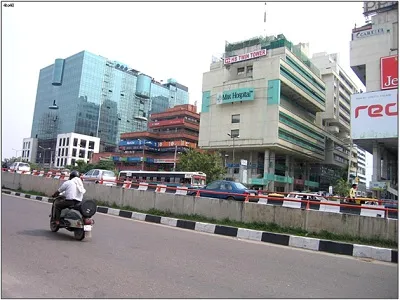
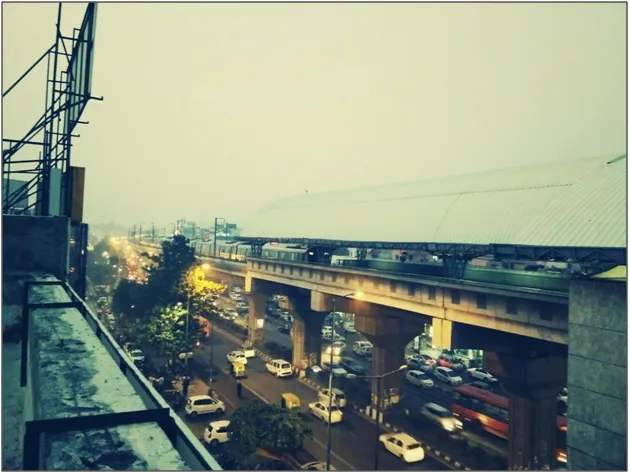
The Location - Pitampura
One big reason why we were only searching for options around Pitampura is since the majority of our now 10 member (including my cofounder and me) team lives near by. A lot of people I know, easily spend as much as three hours a day traveling from their home to their office and back. That’s 700+ hours a year at least. Lower commute time helps you feel better too, apart from saving time and energy.
Anybody who knows Pitampura will know that you primarily have three options in and around the region:
- Independent Residential Buildings or DDA Houses (Illegal for commercial use though)
- The commercial main road (these buildings were previously Independent houses - later approved for commercial usage)
- NSP (Netaji Subhash Place)
Keeping the illegal option off the table, we were comparing between NSP and the independent buildings approved for commercial usage.
Pros for NSP vs Independent floors:
- A more robust commercial look
- Power Backup and Central Cooling
- Most of them are either fully or semi-furnished offices
Cons for NSP vs Independent floors:
- Rentals: NSP is easily $1.10 per square feet per month on super area (~133% of Carpet Area) plus you pay about $0.25 per square feet for maintenance of the building. In short, you are paying around $1.7 per square feet on covered area. Independent floors on the other hand are about $0.93 per square feet on covered area and there is no added maintenance cost.
- Access: You can’t use your office after 9 PM. That’s a big downside. If you want 24 hour access to your office, you need to pay twice the maintenance cost. No such thing for independent floors.
- Connectivity: Nearest Metro station is a good 400 meters - clearly not bad. But do you know how far the station is from where we are right now?
Also, it’s not just us who understand that North West Delhi is slowly turning into a startup hot spot.
Finally, we settled with a Two thousand square feet unfurnished office. This allowed us to design our office based on our requirements. Buying an unfurnished office meant upfront investment, but we did our math and will earn it back in four months thanks to the reduced rent and operating cost.
Office design
Our entire team sat to figure out our requirements for the next 18 months. This is what we came up with:

- One Conference Room
- Two Cabins
- A Pantry/Recreational area
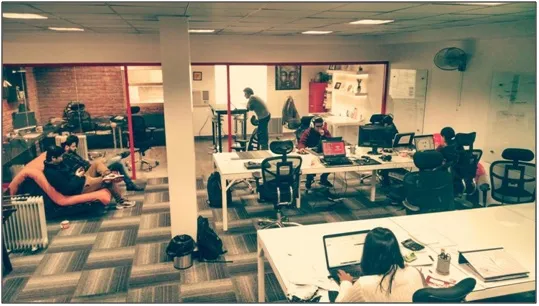
- Bullpen
- Two Team Rooms for expansion of the Marketing and Technology Team.
- A Small Reception
- Nap Room
We designed a floor plan on paper and then used Sweet Home 3D to see a 3D Pan. Also, this is a great site from which we took a lot of inspiration: http://www.officelovin.com/
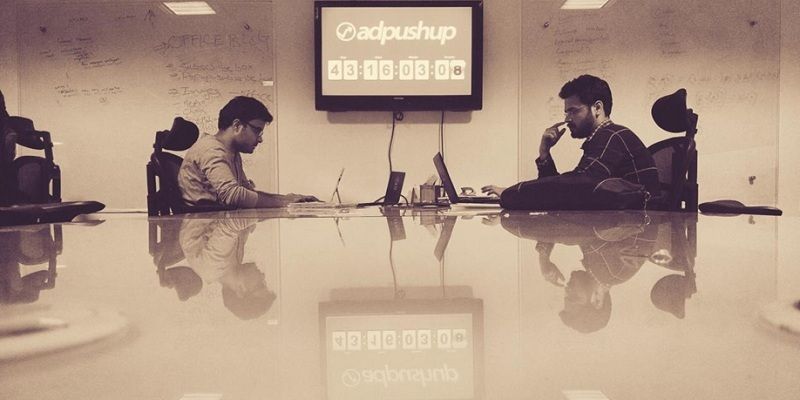
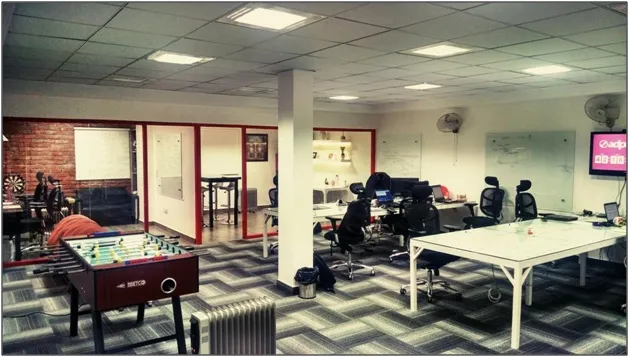
Now, we’ll talk in detail about how we converted our office from this(during construction image) to this (After Construction image).
Gypsum Wall Partitions and Wiring
To begin with, you’ll need a plan for electrical wiring and the wall partitions. Nothing fancy, we just took a print of the blueprint we made in the 3D software and gave it to the contractor.
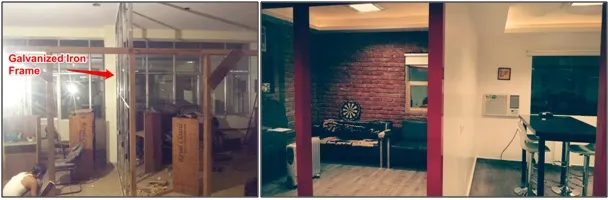
We chose Gypsum Wall Partitions for all the internal walls and Glass Partitions for the bullpen facing walls. Gypsum is durable, light and very cost effective. Generally, you have gypsum boards screwed on top of a galvanized iron frame structure. Cost: $1.33 per square feet of wall. So a typical 10x10 partition wall costs $133.33 or INR 8000.
We gave out the complete electrical work to a contractor at $0.30 or INR 18 per square feet and then asked a local shop to supply all the electrical fixtures, after negotiating the prices.
Since we were going to put a false ceiling, all the wire pipes went above it, taking the shortest route possible.
Glass Wall Partitions
Instead of going with toughened glass partitions, which cost $4 or INR 250+ per square feet (including the glass, installation and fittings), we instead asked the carpenter to create a wooden frame and then had regular glass installed inside. It costed us about $2.5 or INR 150 per square feet to get such partitions with 8 mm glass.
Note: I feel it is important to point out that every glass wall/table-top is functional to be written upon, which is a great advantage. I just love seeing people writing their ideas and plans on a glass wall.
Besides, using glass is excellent in a work environment as it promotes transparency, saves energy and looks beautiful. I want to mention here that recently there has been a lot of research urging people to weigh the pros and cons of “open-office plans”.
However, we decided to stick with the ‘pros’. Our team is currently small and to be honest, we designed the office keeping them in mind and what helps us perform better. Meaning we encourage (and need) group discussions, quick collaboration and impromptu growth “as you were” meetings.
I’ve noticed that when I’m sitting closer to the team, there is less friction, in asking questions and we have more discussions than otherwise.
Zappos describes this feeling of transparency and openness better than me.
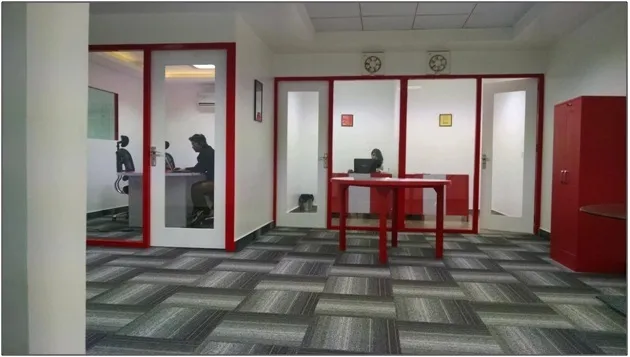
However, we also have Private Cabins and Semi-Private Rooms, which are available for anyone to use if they want to work in isolation. This picture might help make my point clearer.
Electrical Wiring
Ideally, you’ll want to draw a wire plan keeping in mind the wiring for:
- Overhead Lights
- Sockets on the Walls and Workstations
- AirCon Units
- Intercom Wiring (if required)
- LAN Cat6 Wiring
While it’s best to go elaborate with the wiring plan, but it can be also be easily explained by simply marking your requirements on the 3D Layout. Try to place the EPBX system and the LAN rack around the center of the office, to reduce cabling cost, like we did.
Furniture: Workstations
Modular workstations typically start from $180 a seat and we thought it was expensive. So we asked our carpenter to construct them.
Desk space of 4 feet x 2 feet for each employee (6 at a table) within a single table sized at 12 feet by 4 feet. Since these were large tables and we didn’t want to make them very heavy, we didn’t use wood for the structure. Wrought Iron did this job well and they were covered with wooden boards. Total cost: $40 a seat. Plus a long wooden frame under the tabletop for Modular Switchboards and wiring.
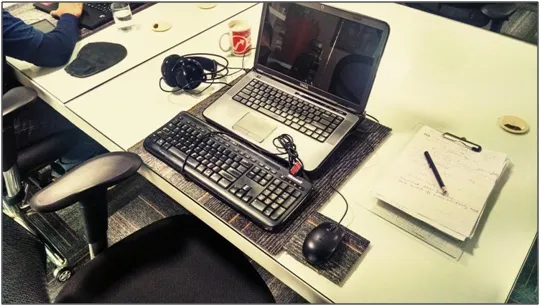
But these tables weren’t quite ready before the application of paint. After seeing the tables at Investopad, I knew what I wanted. We settled with PU High Gloss from ICA. Two coats of ICA White Sealer, with a lot of sandpaper between all coats, followed by two coats of PU high glass. Rubbing and waxing in the end. Cost of paint including its application: $2.5 per square feet.
However, we did make a mistake here. One thing we missed (and which another painter pointed out later) was that a thin layer of MDF board should have been placed before the paint to make the table more scratch resistant and symmetrical.
Other Furniture Bought for the Office:
- Bunk Bed: $120 (bought from here)
- Table for Meeting Rooms: Cost $120
- Round Tables for the Kitchen: Cost $90
- Conference Room Table: $200
- Highrise Table: $190
- Kitchen Shelves and Countertop: $350
- Storage Cabinet: $120
Chairs
Chairs are very important, which a lot of young startups unfortunately realize later. Chairs have a great impact on an individual’s productivity and health. The last thing you want is your team spending their time and money with an orthopaedician.
While the Herman Miller and SteelCase (about $600 per chair) considerably exceeded our budget, we were aiming to get the best unbranded ergonomic chair.
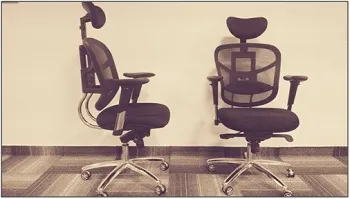
- The current chair has:Adjustable armrests
- Adjustable height
- Adjustable lumbar support
- Adjustable seat base position
- Adjustable headrest (vertically and horizontally)
- Tilt plus Lock at any position
- Two year on-site warranty
In short, you can adjust pretty much anything in this chair and boy, are they comfortable! The only downside is that sometimes we fall asleep in them ;)
Cost: About $200 per chair.
Doors
Toughened glass doors are expensive and priced around $250 a door, including the glass, installation and the door machine. We decided to try something more trendy and less costly. We bought wooden flush doors at $70 apiece. Then the central (about 2 feet by 5 feet) board was removed to make way for regular 5mm glass. Finally, PU High Gloss painted on the sides. The final result:
Air Conditioning
We compared between central cooling and Individual cooling units. For a Two thousand square feet office, Individual cooling units were better suited, provided that they are appropriately distributed.
- Central cooling units cost almost twice as compared to Individual units to reach the same tonnage. Plus you need ducting before hand.
- Individual units can be turned off wherever and whenever they are not required.
The Brick Room
This room is for the Tech team designed by Atul and you can usually find him there.
Specs include:
- Brick walls with varnish paint
- Overhead height-adjustable lamp
- Worn out sofa
- Ebony veneer table
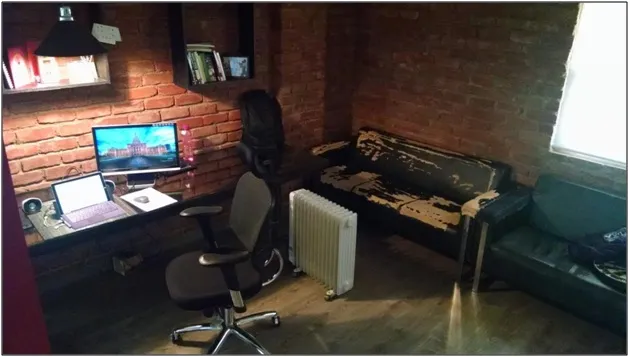
Yes the sofa is purposely kept in such a fluffed state because it is a reminder of some very dear memories from our previous office
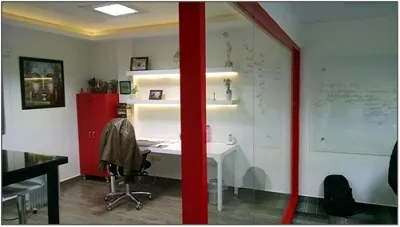
The White Room
This room is built for the use of the Marketing and Sales Team and I tried to keep it as minimalistic and white, as possible.
- A large window
- PU high gloss painted table and wall mounted shelves
- High rise meeting table
- Table plants

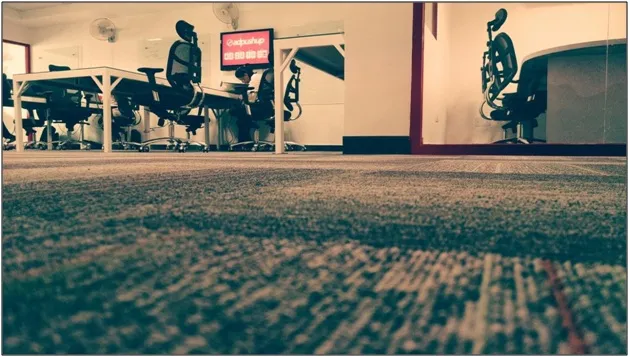
Flooring
Wooden flooring for the brick and white room, while carpet tiles for the bullpen, both at about $1 per square foot and ceramic tiles in the kitchen, which were already set on the floor before we took the space.
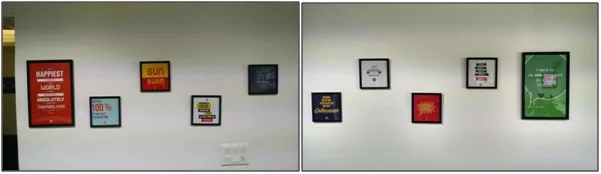
Posters
Those empty walls are a great place to put up some inspiring quotes! We bought some really kick-ass posters from ThinkPot.
Checklist for the Recreational Area
- Board gamesChess, Scrabble and a lot of other board games.
- Ping Pong/Table Tennis Table
- Foosball
The Concept of a Functional Home
I am surrounded by team members who have a consistent rush of zeal to get work done. But because of this adrenaline rush most of us forget to look at the clock and when we finally do; the realization occurs that we need to head back home shortly.
Personally, my enthusiasm keeps rising as the day passes, making me highly productive in the night, but at the cost of delayed sleep phase syndrome, a common form of insomnia.
But what if one had everything right inside the office? How much time and effort would such an arrangement save, right?
We don’t have formal working hours and quite a few team members prefer working late. Adequate rest is essential, so we decided to make sure that the office is comfortable enough for anyone wanting to stay over.
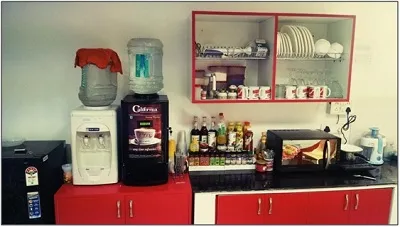
Our office is designed in a way to allow everyone to work for as long as they want; with the comfort of a home. We have a fully equipped kitchen, a bedroom and shower.
Here’s a checklist that we used for our kitchen:
- Microwave
- Microwave safe crockery
- Induction cooktop
- Induction friendly utensils
- Hand blender
- Fire extinguishers
- First-aid kit
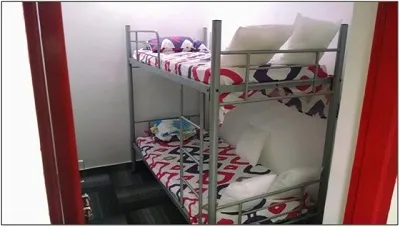
Apart from a complete kitchen, we’ve also got bunk beds, washrooms (with hot water showers) and a mini-gym to make sure you don’t miss home.Finally, the complete financials: Total expenses in immovable assets/fixtures/services (i.e. total expenses on services or items which we won’t be able to shift to a new office) such as painting, carpeting, false ceiling, etc: $13,553.5
Oh and did I tell you that we negotiated hard on the rent agreement and got the first three month rental waived off and also here was no brokerage involved (typically one month rent).
Money Saved: $7600.
Hence, the cost of building our office, after deducting savings is: $5953.5
So, there you have it. This is our story of how we went about opening a new office where my team and I love to work and spend the most part of our day.
Lessons Learned:
- Build a functional home, rather than an office. One where it is not a pain to burn the midnight oil while working in surplus.
- Take office space in a complex where they do not charge extra for operating outside the standard office timings of 10 to 6.
- Don't rely on time consuming meetings with an architect to finalize a blueprint. We are lucky to be in the day and age where we have the software and technology that enables us to create our own customized floor plans among other specs; for free. Use them.
- In India at least, supervise everything during construction, yet remember that building the office is not your full time job. I would take a stroll to the new office every now and then, between work.
- Just like with everything else, before you hire any contractor or workman, take reference.
- Never compromise on your vision of the ‘ideal office’. The current office is exactly how we imagined it; right from the carpet texture and design to the washroom faucets.
Finally, if you have any questions or want more details about anything then don’t hesitate. Put it down in the comments and I will give an honest reply to it. Cheers!

I know it is self-indulgent but my team unanimously wanted the post to finish with this picture (also there is a clever hint in there somewhere!)
P.S. We’re hiring.
Credits: Thanks Sujan for all the pictures!
About the author
Ankit Oberoi is a co-founder at AdPushup, a startup focused on helping publishers and bloggers optimize their ad revenues. You can reach him on Twitter @oberoiankit.