

Step by Step Guide to Create First Windows Azure Application
Wednesday February 29, 2012 , 9 min Read

Here is a step by step guide to developing and deploying your first Windows Azure application. This tutorial has been re-published from http://debugmode.net/ with the permission of the author.
This article is divided into five parts:
- Installation of Windows Azure SDK
- Developing First Windows Azure Web Application
- Deploying application locally in Development Storage Fabric
- Registration for free Windows Azure Trial
- Deployment of the Application in Microsoft Data Center
I will start fresh with installation of Windows Azure SDK and I will conclude this post with deployment of simple application in Windows Azure Hosted Service. I am not going to create a complex application since purpose of this post is to walkthrough with all the steps from installation, development, debugging to deployment. In further post we will get into more complex applications. Proceed through rest of the post to create your first application for Windows Azure.
Installation of Windows Azure SDK
Step 1
Go to official site of Windows Azure at link http://www.windowsazure.com/en-us/
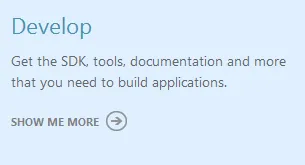
Step 2
In bottom of page, you will get Develop option. Click on Show Me More.
Step 3
Now you need to choose the language you want to work with. You can develop application in any of the language given in option and deploy it on the Microsoft managed datacenters. Below are the available languages.

To start developing using .NET, click on .NET.
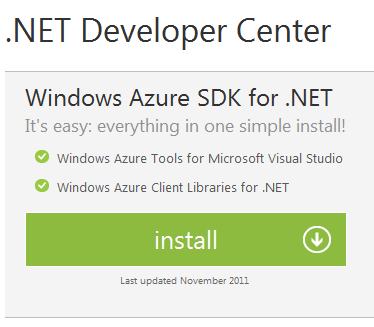
Step 4
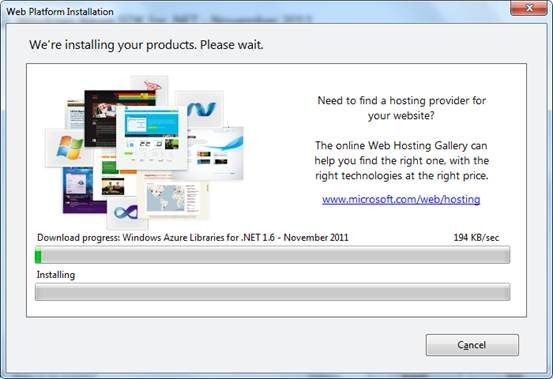
You will be navigated to Home Page of .NET Developer Center. You will get all the resources related to .NET development on Windows Azure here. Now click on Install to install Windows Azure SDK. I am assuming here that you are already having VS2010 on your machine.
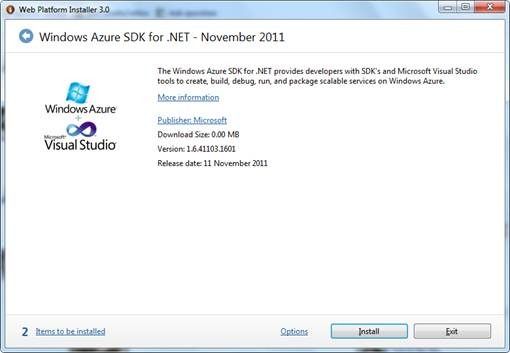
Windows Azure SDK and tools are available to install via Web Installer. Click on the Install in the dialog window.
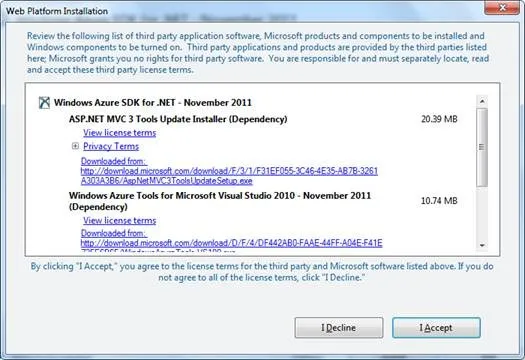
Next dialog windows will prompt you to agreement. Select I Accept option to proceed.
You will be getting dialog window indicating Windows Azure SDK being installed.
After successful installation you will get confirmation dialog windows as below.
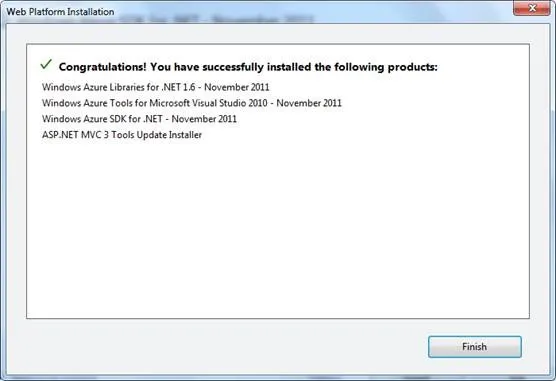
Now click on Finish and Exit.
Congratulation by now you has installed Windows Azure SDK on your machine.
Developing First Application
Open Visual Studio 2010 as administrator and create a new project. Open File -> New->Project. From Cloud tab select Windows Azure Project.
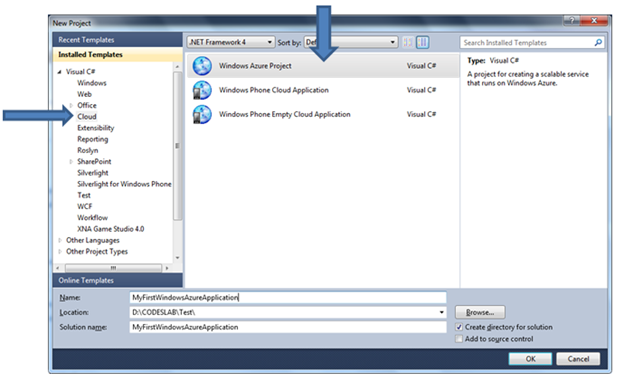
Next you need to click on your preferred language. You can use any of the three languages to develop application to be deployed on Windows Azure. I am choosing language Visual C#. After clicking on the language you will get options to select as either Web Role or Worker Role.
![clip_image001[6]](https://images.yourstory.com/cs/wordpress/2012/02/clip_image0016_thumb.png?w=639&h=400?fm=png&auto=format)
Before we proceed further, let us stop by and try to understand what are the Web Role are Worker Role?
Web Role takes HTTP input and Process it. It gives output as HTTP Response. It takes input from user via a user interface.
![clip_image002[6]](https://images.yourstory.com/cs/wordpress/2012/02/clip_image0026_thumb.png?w=445&h=141?fm=png&auto=format)
Web Role can be summarized as below,

You create any application as Web Role instance. For example,
- If you want to create a Web Application using ASP.Net then you will be choosing an ASP.Net Web Role in the project template
- If you want to create a WCF Service and deploy it on Azure then you will be choosing WCF Service Web Role.
- If you want to create ASP.Net MVC application then you will be choosing ASP.Net MVC Web Role.
Worker Role runs in the background. It is used to perform some background task. It does not take input from user. It takes input from Azure Storage or web Role.
Worker Role can be summarized as below,

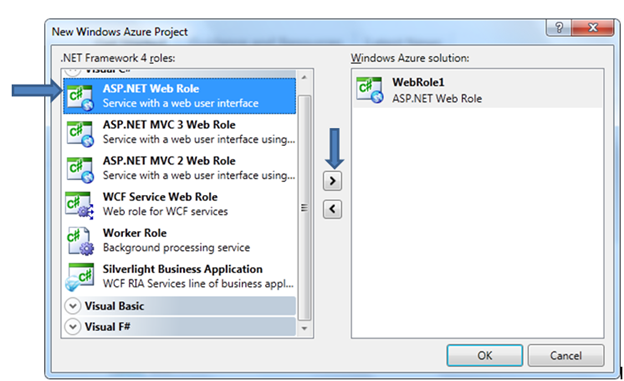
Let us get back to creating first web application to be deployed on Windows Azure. Go ahead and select ASP.NET Web Role and click on arrow button. If you want you can change name of the Web Role. Since this is your first application so for the simplicity leave default name. After selecting Web Role click on Ok.
On exploring solution explorer you will find that there are two projects. One project is Widows Azure Project and other is ASP.Net Web Role.
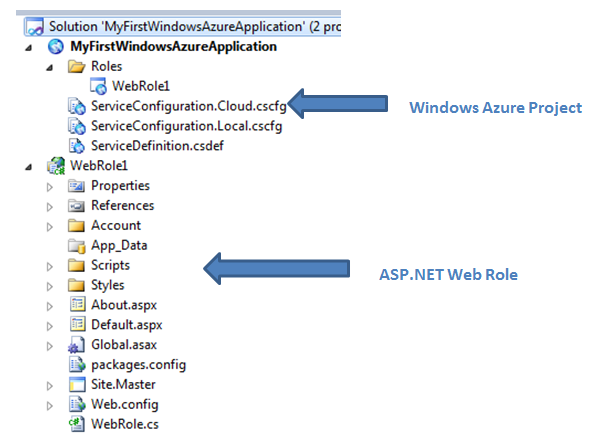
Let us explore Windows Azure Project. Project got two Service Configuration files. Extension of Service Configuration file is cscfg

One Service configuration file is for local deployment and one contains configuration details to deploy to Microsoft Data Center. On opening service configuration file, you will get below XML.
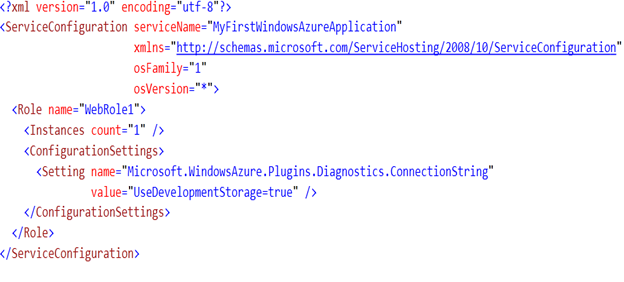
Below information’s are provided in service configuration file.
- Operating system version
- Operating system family
- Connection string settings
- Instance counts
By default instance count is set to 1. It means there will be one instance of Web Role will be running for the deployment. Let us go ahead and increase instance count to 2. Change value to 2 in Instance count entry as below and save the file.

Next important file is Service Definition file. Extension of Service Definition file is csdef

On Opening service definition file you will get below XML
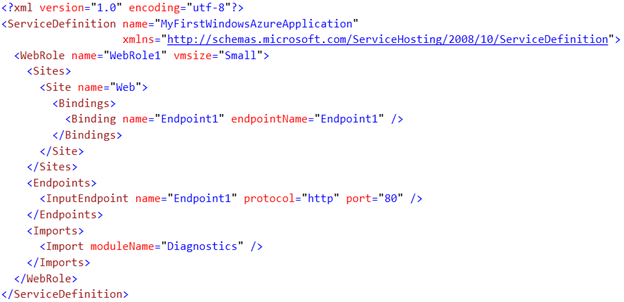
Service definition file contains information about binding and different sites. It contains information about EndPoints and default port number. In normal scenario, you may not need to edit this file.
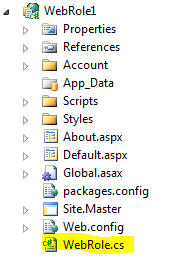
Next important file is WebRole1. If you remember we did not change name of the Web Role while creating it in previous step.

When you click on WebRole1, you will get below UI.
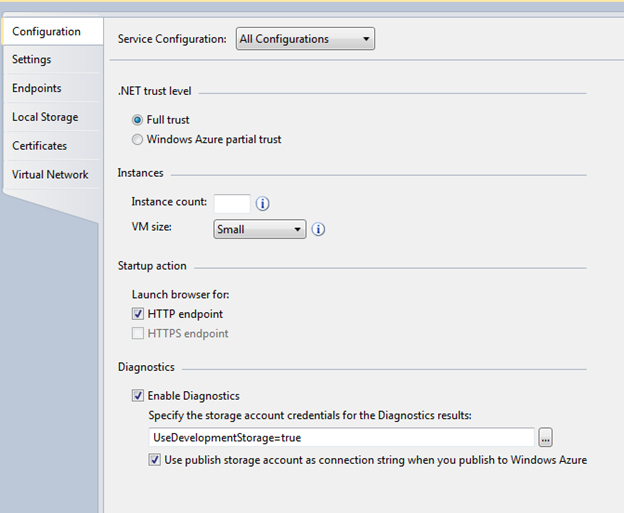
In this UI you can,
- Manage Settings
- Configure Web Role
- Configure local storage
- Manage settings
- Configure End Points
- Manage virtual networks
In later post we will go into details of each of the section of this UI. As of now we can proceed with default values.
Now we have a bit understating on different files in Windows Azure project in the solution. Other project is normal ASP.NET Web Application project with one extra file called WebRole.cs. This file is used to host web application in Windows Azure.
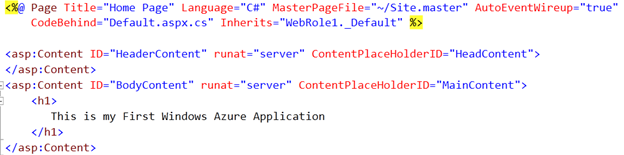
Let us open default.aspx and modify it as below, I have deleted all the default codes from MainContent and put one H1 tag as below.
By this, we have created a simple ASP.Net Web Role Application to be deployed on Windows Azure.
Deploying Application Locally
You deploy application in two steps. First you deploy it locally to do testing that if everything is working as expected. You can debug application deployed on local development fabric. A Windows Azure emulator run locally is also known as Windows Azure Development Fabric.
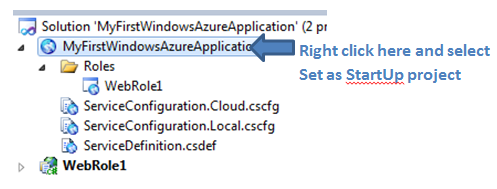
To run Windows Azure Web Role application locally makes sure that Windows azure project is set as startup project and press F5. To make Windows azure project as startup project right click on that and select set up as startup project
After setting startup project press F5 to run application on local development fabric. After pressing F5 you can see that in bottom you are getting messages like initializing the Windows Azure storage emulator etc.

On successful deployment you should be getting Ready message at bottom

After successful deployment browser will get launched and you can see your Windows Azure Application running on local development fabric.
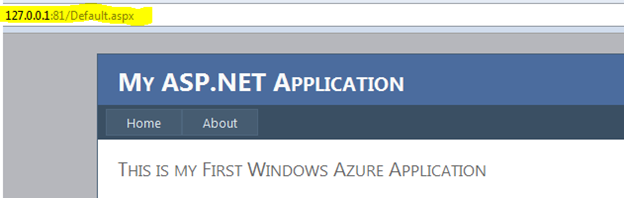
You can see application is running on port 81 and default start page is default.aspx. Let us explore local development fabric. To open local development fabric from the task bar right clicks on Windows Azure icon.
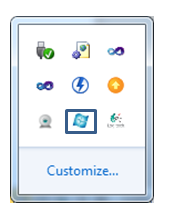
Right click on the Windows Azure icon and select Show Compute Emulator UI. You will get Windows Azure Compute Emulator UI. In emulator you can see health of the Web Role instances. There are two instances running since we configured two instance of Web Role in service configuration file.
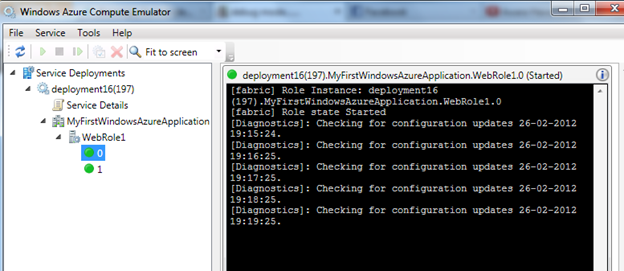
On right clicking on the Web Role instance you can set logging level and can open local store.

In further post we will get into details of logging and health of Web Role instances. As of now we have seen the way to create Windows Azure Web Role Application and deploy it locally. Now let is deploy created application in Microsoft Data Center or on real cloud.
Deploying Application On Windows Azure Portal
To deploy application on Microsoft Data Center you need to have a Windows Azure Account. Windows Azure is a paid service however you can start with free trial. To register for free account follow the below steps.
Register for Free Account
Step 1
Go to official site of Windows Azure at link http://www.windowsazure.com/en-us/
Step 2
In right hand side click on free trial

Step3
Next click on Try it free.
Step 4
You will be asked to login using Live ID. Provide your live id and login. If you don’t have live ID create one to work with Windows Azure Free Trail
![clip_image005[6]](https://images.yourstory.com/cs/wordpress/2012/02/clip_image0056_thumb.jpg?w=393&h=399?fm=png&auto=format)
Next proceed through the screen to create free account.
![clip_image007[6]](https://images.yourstory.com/cs/wordpress/2012/02/clip_image0076_thumb.jpg?w=504&h=332?fm=png&auto=format)
After successful registration you will be getting a success registration message. After registration go back to visual studio and right click on Windows Azure Project and select Package.

Next choose Service Configuration as Cloud and Build Configuration as Release and click Package.
![clip_image001[10]](https://images.yourstory.com/cs/wordpress/2012/02/clip_image00110_thumb.png?w=330&h=180?fm=png&auto=format)
After successful package you can see Service Package File and Cloud Service Configuration file in the folder explorer. We need to upload these two files to deploy application on Microsoft Data Center.
![clip_image003[6]](https://images.yourstory.com/cs/wordpress/2012/02/clip_image0036_thumb.jpg?w=624&h=333?fm=png&auto=format)
After successful registration for free account again browse to https://www.windowsazure.com/ and click on Management Portal from Account section in bottom.
You will be navigated to live login page. Provide same live id and password you used to create Free Trial. After successful authenticating you will be navigated to Management Portal.
To deploy on Microsoft Data Center, first you need to create Hosted Service. To create Hosted Service from left tab select Hosted Service, Storage, Account and CDN
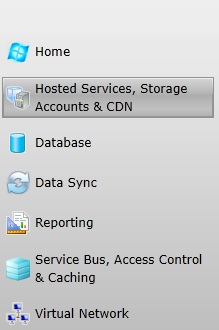
In top you will get three options. Their purpose is very much clear with their name.
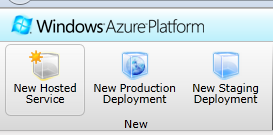
Click on New Hosted Service to create a Hosted service. Provide information as below to create hosted service.
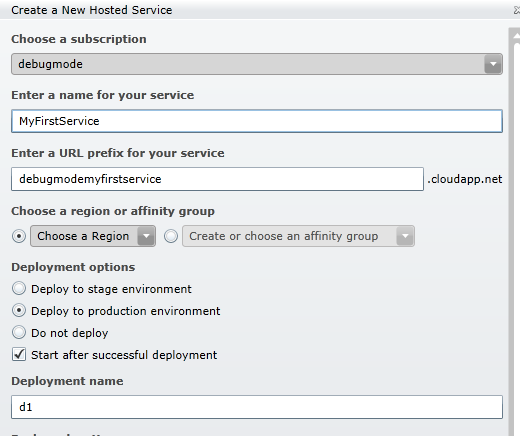
Choose Subscription Name. It should be the same as your registered subscription of previous step.
- Enter name of the service
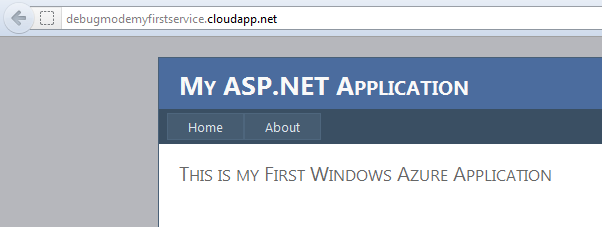
- Enter URL of the service. This URL need to be unique. On this URL you will be accessing the application. So this application will be used at URL debugmodemyfirstservice.cloudapp.net
- Choose a region from the drop down. In further post we will get into details of affinity group.
- In Deployment option choose, Deploy to production environment.
- Give a deployment name.
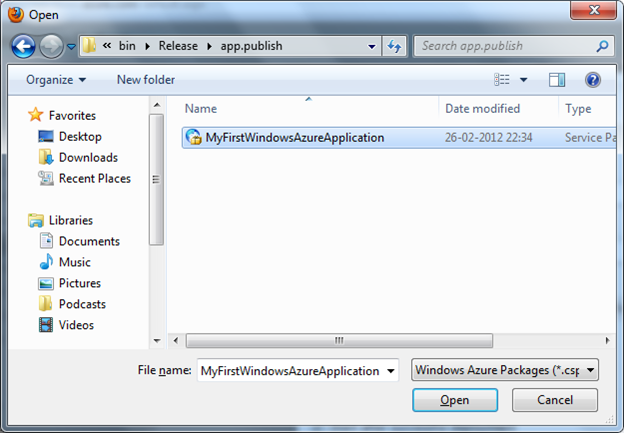
Next to upload package select browse locally. On browsing navigate to folder YourFolderNameMyFirstWindowsAzureApplicationMyFirstWindowsAzureApplicationbinReleaseapp.publish and choose files.
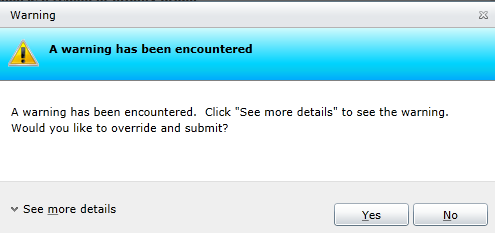
As of now for simplicity don’t add any Certificate and click on Ok to create a hosted service with package of application created in last step. You will get a warning message. Click Yes on warning and proceed.
Now you need to wait for 5 to 10 minutes to get your application ready to use. Once service is ready you can see ready status for the Web Role.

After stats are ready, you are successfully created and deployed first web application in Windows Azure. Browse to URL http://debugmodemyfirstservice.cloudapp.net/ to see your application running from Microsoft Data Center.
In this way you can start developing for Windows Azure. In further post we will go into many details. I hope this post is useful. Thanks for reading.
This tutorial is authored by Dhananjay Kumar, a Microsoft MVP. His blog can be found at http://debugmode.net/