Tutorial: Adding a Custom Domain Name to Windows Azure Web Site
One of the recently added features to Windows Azure is the Web Sites. It gives developers a chance to deploy ASP, ASP.NET, Node.js and PHP web sites with no friction. Typically, the deployed websites are accessible through http://yourwebsitename.azurewebsites.net. While the free threshold doesn’t support attaching a custom domain name, moving the web site to the reserved mode enables us to point a custom domain to it. This tutorial shows you how to configure an external DNS service for a website deployed to Windows Azure Web Sites.
This tutorial assumes that you have a valid domain already registered with a registrar like Go Daddy. To separate the DNS management from the domain registrar, we will sign up with DNSMadeEasy.com. This will let us manage the DNS independent of the domain registrar and the hosting platform. The other advantage of DNSMadeEasy.com is the programmability of the DNS through the REST API.
There are three steps involved in adding a domain name –
- Configuring Go Daddy to point the Nameservers to DNSMadeEasy
- Adding the URL of the Azure Web Site to DNSMadeEasy to the CNAME
- Updating the hostname at the Windows Azure Management Portal
Prerequisites
- A registered domain
- Trial account at DNSMadeEasy.com
- Web Site successfully deployed at Windows Azure listening at http://yourwebsitename.azurewebsites.net
Step 1 – Configuring Go Daddy to point the Nameservers to DNSMadeEasy
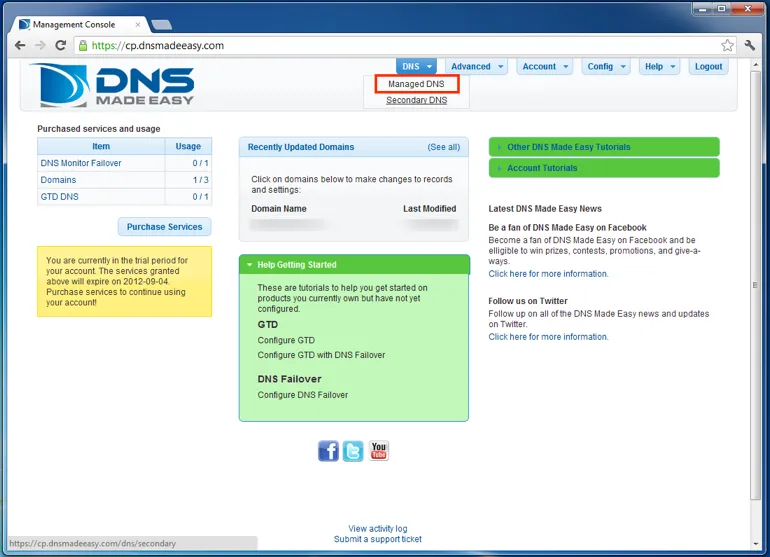
Login to DNSMadeEasy.com and click on the DNS menu at the top to select Managed DNS
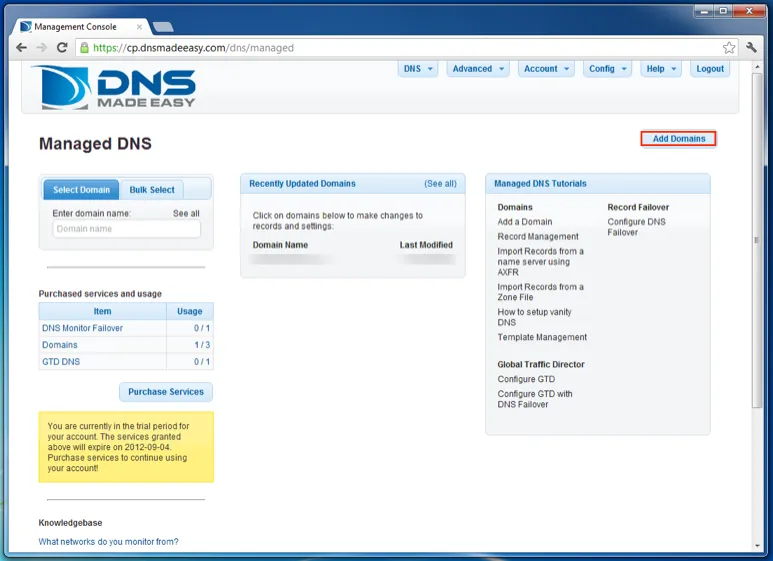
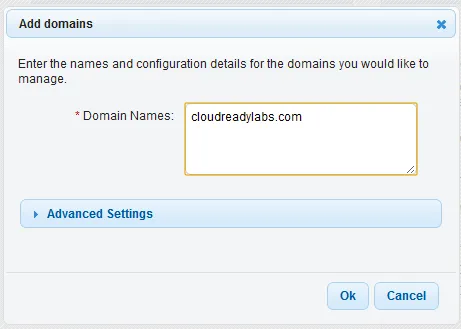
Click on Add Domains button and type the domain name that is already registered with Go Daddy
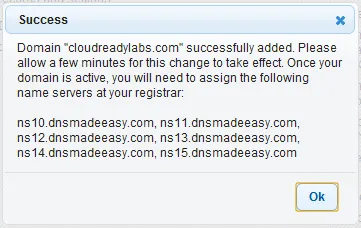
After a few minutes, click on the domain name that is just added. Click on the Name Servers tab you see the list of Name Servers assigned to this domain.
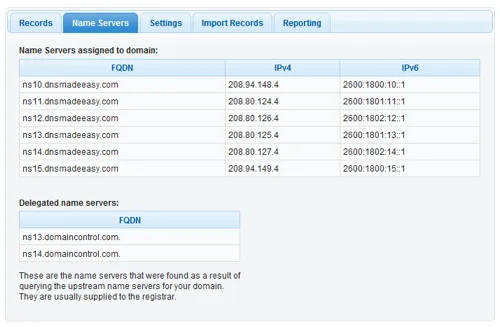
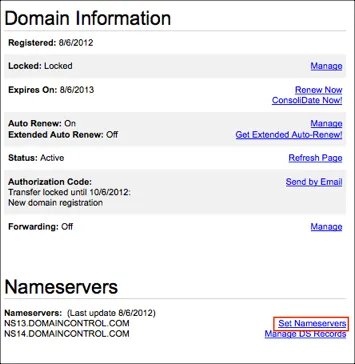
Make a note of the Name Servers listed here. Notice that the FQDN reflects the Name Servers currently assigned by Go Daddy. We will change it by logging on to Go Daddy control panel. Launch the Domain Manager for the domain you want to configure in Go Daddy and click on Set Nameservers link.
Select I have specific nameservers for my domain option and enter the Nameserver addresses provided by DNSMadeEasy
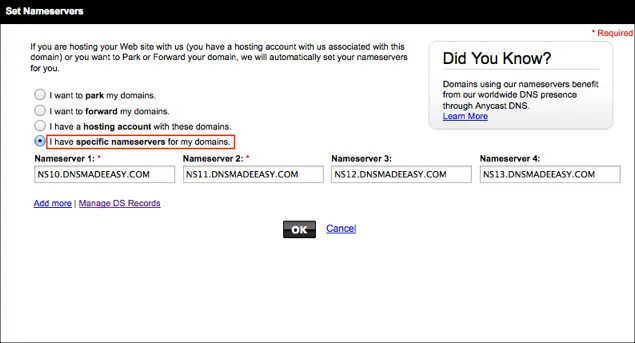
Give it a few minutes for the DNS to propagate. This will point the domain to the Nameservers of DNSMadeEasy. Go Daddy control panel will confirm this after by showing the new DNS Nameservers.

Step 2- Adding the URL of the Azure Web Site to DNSMadeEasy
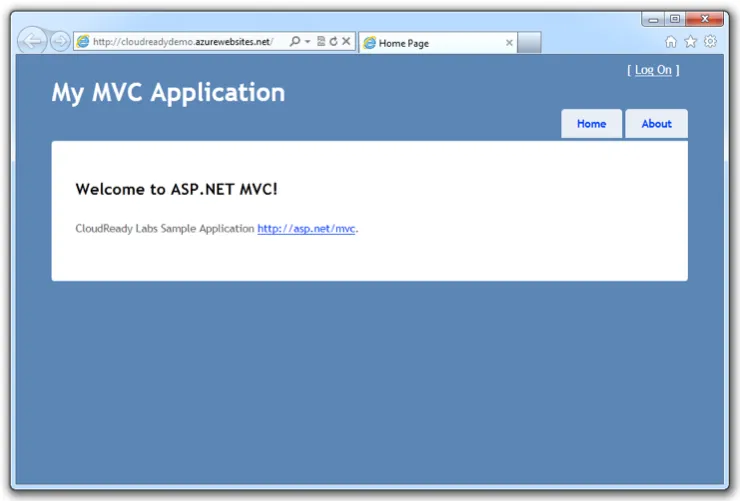
Currently, the website deployed at Windows Azure is available at http://cloudreadydemo.azurewebsites.net/
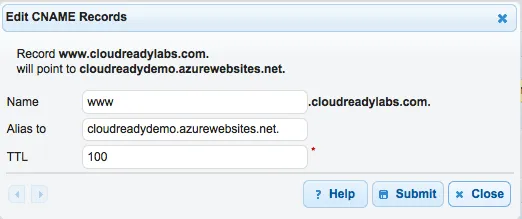
Switch to DNSMadeEasy and click on the domain that was created in the last step. Under the CNAME Records, click the + sign and add the endpoint of the Windows Azure Web Site. Enter www for the Name and the URL of the Windows Azure Web Site with a trailing period (.) at the end. This will instruct DNSMadeEasy to point the domain to the complete URL instead of creating a sub-domain. Finally, click on Submit.

Step 3 - Updating the hostname at the Windows Azure Management Portal
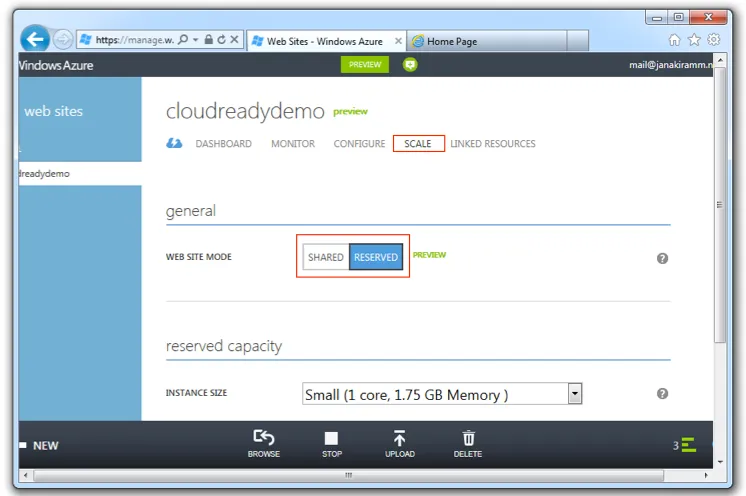
Since we can only add the domain to the websites running in the reserved mode, we will first move the website from the shared mode to reserved mode. To do this, login to Windows Azure Management Portal and select the website that you want to configure. Click on Scale and switch to reserved mode.
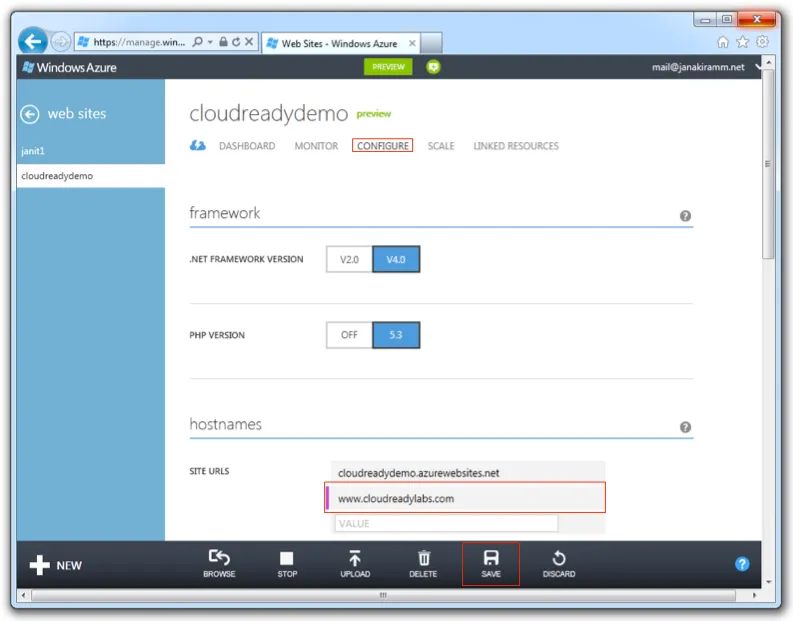
After that is done, click on configure, enter the custom domain name under the hostnames section and click on save button at the bottom.
Windows Azure will check if the CNAME records are already configured for this URL and if it finds, it will accept the hostname.
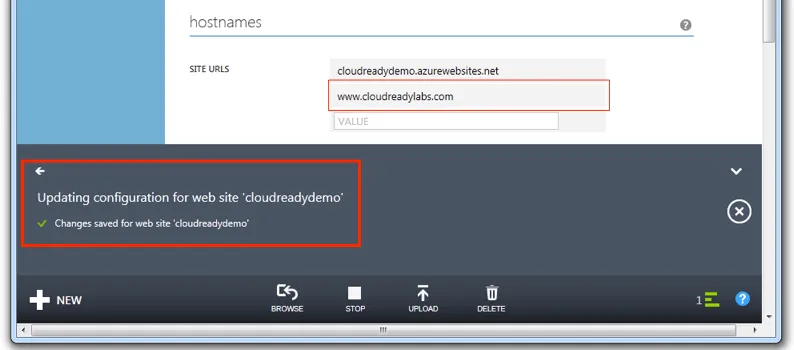
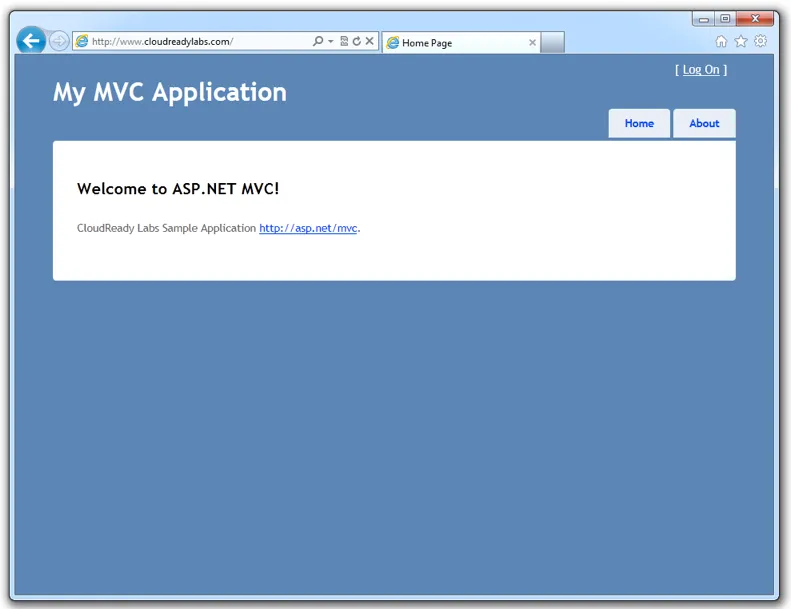
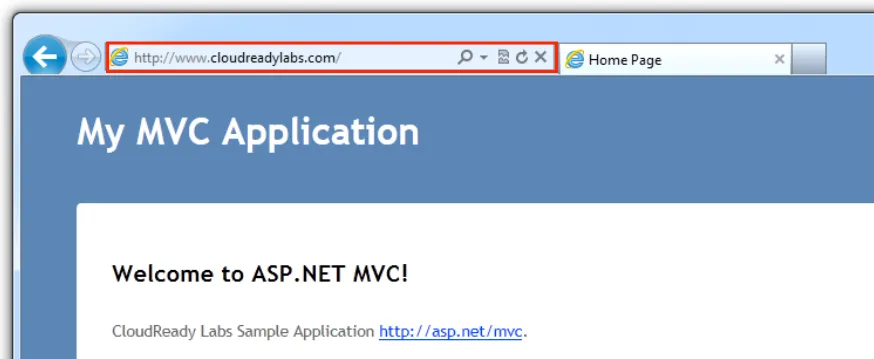
Now our website is accessible through the custom domain.
Hope this helps you to easily configure a custom domain for your Windows Azure Web Sites.
- Janakiram MSV, Chief Editor, CloudStory.in


