The right way to go from idea to world-class product
Calling all Hardware entrepreneurs! If you have a product idea, but limited knowledge about product development, this article is for you.

Product development
Proof of Concept (POC)
Proof of concept is a basic prototype of the core functionality. Try not to accommodate extra features at this stage. Generally, building a proof of concept involves making the product using electronic prototyping platforms such as Arduino, Raspberry-pi, General Purpose (GP) PCB, and Breadboard.
Why should you build a proof of concept before starting product development?
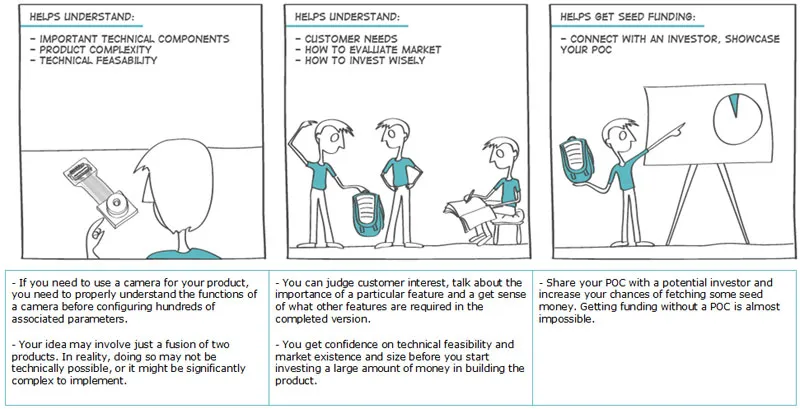
Armed with initial customer feedback and some idea about the implementation complexities, you can start drafting the product specifications.
End Outcome
From a product development point of view, one of the most important outcomes of this exercise is creating product specifications. After presenting your POC and interacting with your potential customer base, you will be able to better understand your customer needs and put them into these three buckets:

Next, study your competitors’ solutions to understand what customer needs they are addressing. Many times, customers you meet may forget to mention some 'must haves' that your competitor may have addressed.
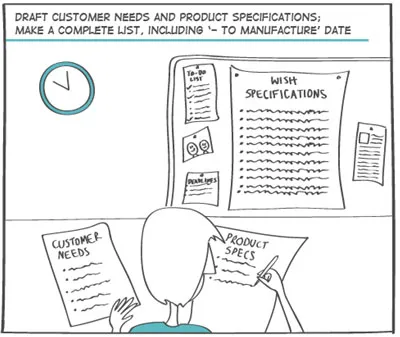
My master project guide, Dr. Andre Pittet, suggests making 'wish specifications' first and then cutting down the features based on availability of time and complexity of implementation. Also, your customer-facing team should get feedback from customers on each feature.
Your specifications list needs to be complete – it should include everything from operating temperature, humidity level, and amount of mechanical load it can take to target cost.
Design
The design phase starts with detailed specifications and ends with a product. It involves all design considerations – manufacturability, certification, and so on. The typical timeline for this is six months to three years. The best way to speed up the development process is to reduce the number of changes you make to the product specifications.
For an electronic product, there are mostly two design activities – electronics design and mechanical design. You might have a few more. For instance, we have the fashion design activity as well.
Here, I have assumed that you have already found a good solution for the problem you are trying to address and have a block diagram of your solution ready.
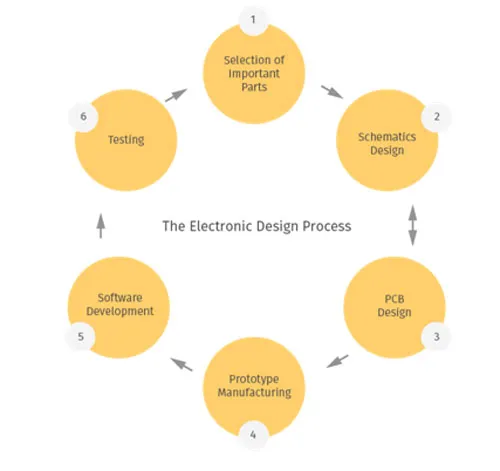
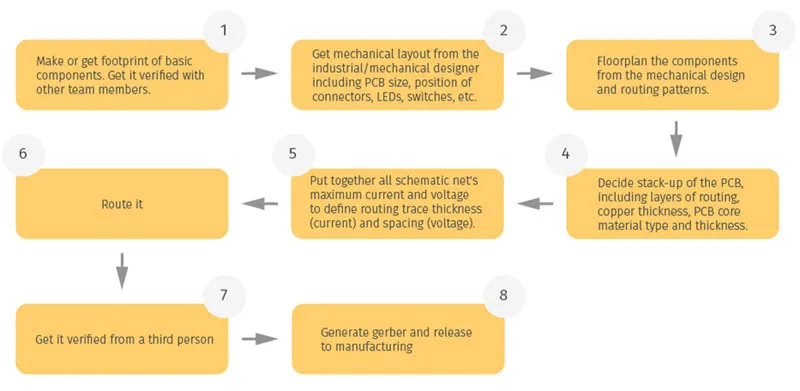
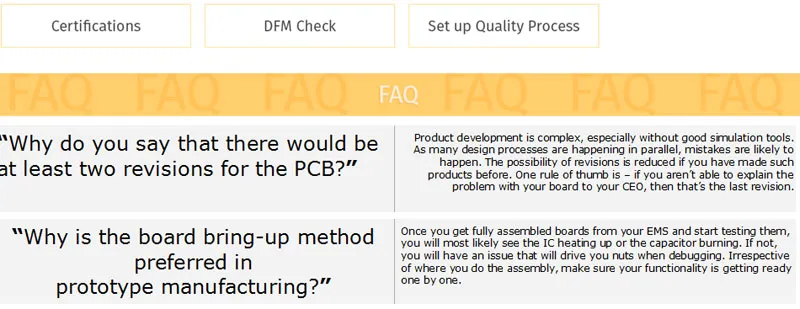
Above is the self-explanatory process chart to be followed in Electronic Design. Here, steps 1, 2 and 3 go together and steps 5 and 6 go together. You will have at least two revisions of the above process. Sometimes you’ll have four or more revisions because of small inaccuracies. Hardware Design needs a focused mind!
Mechanical design/Industrial design is the most important part of your product. as users interact with this more than just the underlying electronics. It is an especially important aspect if you are making a consumer product. Also, mechanics manufacturing is much more complex than electronics manufacturing.
Work with a good industrial design firm. Typically, an industrial design firm has an industrial designer (who handles studying user requirements and creativity) and one mechanical engineer (who works to understand manufacturing processes and materials). The industrial designer, mechanical designer and electronics designer should work in synergy. The chart below outlines the simple process for mechanical design from an electronics designer point of view.
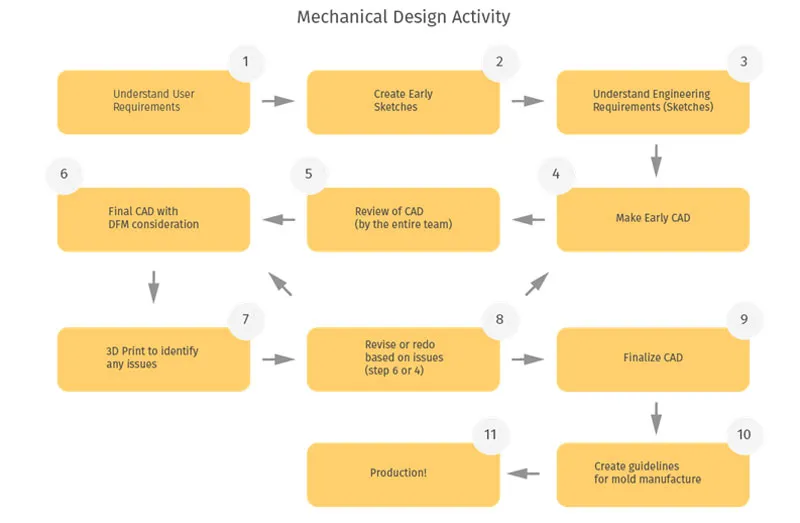
Selection of Important Parts
After defining specifications, you start with the important and critical bit –selection o parts. This includes your camera or any other sensor, micro-controller, battery, power regulators, or battery charge controller. I would recommend that these parts be put into the schematics as well.
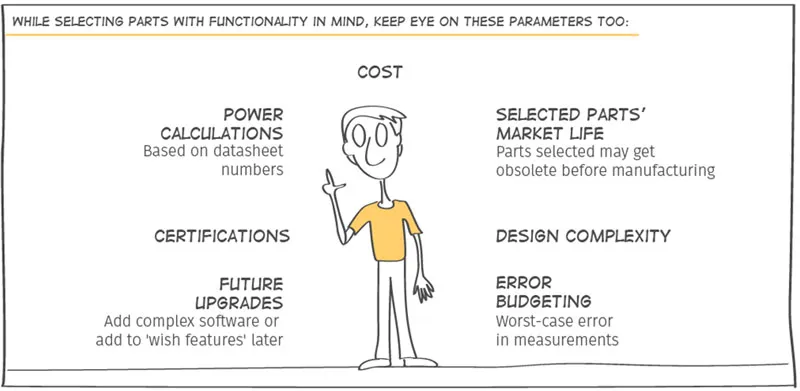
Here are a few tips for parts selection –
- Getting design support (using reference designs, application notes, forums, software support) is an important consideration.
- Involve a component distributor (like Avnet or WT) from the start of your design process. They will make sure you get all the required support.
- Get a quote for 1,000 pieces to estimate the BOM (Bill of Materials) cost.
- When sourcing components like batteries from China, ask for certificates (MSDS, UN 38.3) upfront, even before placing a sample order.
- Before selecting a microcontroller, find out what the development tool costs are. For instance, TI has excellent BLE chip cc2540/CC2541 but TI's pre-compiled libraries for BLE stack are available for IAR only. An IAR license costs a few lakhs!
- Choose ARM-based micro-controllers as they make your system scalable and they support GNU tools.
- If you have complex functionalities, get EVM (EValuation Modules) boards and test your functionality on the EVM boards.
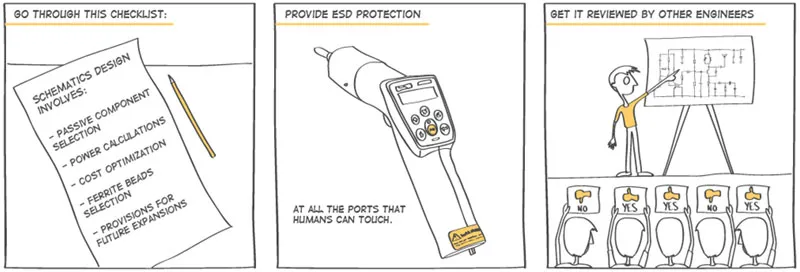
Schematics Design
Once you have selected critical parts for your product –
PCB Design
Here are the recommended steps for PCB Design –
Some tips on PCB design –
- Save on assembly cost by opting for one-sided component mounting.
- Involve the PCB manufacturer at the start and during the design phase.
- Ensure that you check your costs before selecting the passive package size.
- Follow the Integrated Circuit (IC) manufacturer's layout guidelines.
- Try to get one undisturbed ground plane with no traces and merge analogue and digital grounds in this plane. The idea here is to minimise ground resistance so that digital current can't create ground noise. Undisturbed ground plans help with Electro-Magnetic Compatibility (EMC).
- Make sure that the design has taken care of the manufacturing tolerances. Sometimes the PCB cutout tolerances cause problems of board fitment in an accurately designed enclosure.
- Be sure of the kind of surface finish you want. Popular ones are HASL, lead-free HASL, ENIG, OSP and gold. Read about each of them and wisely choose one. Very few manufacturers support OSP in India. But it is one of most cost-effective and good quality solutions for mass production. Make sure your PCB assembly manufacturer is ready for OSP.
Prototype manufacturing
Manufacture your designed board! Generally, we prototype 10 boards.
Good prototype manufacturer: PC process Peenya, Bangalore or PCB power, Gandhinagar, Gujarat
Lead time: ~ 1 week
PCB assembly: We don't make stencils at this stage. However, if you have complex PCB, you might have to do that. We do manual mounting and soldering. For complex PCBs, you might have to go to Electronic Manufacturing Services (EMS).
We normally follow board bring-up method for PCB assembly. In board bring-up, we mount components in stages and check the functionality in stages. We first mount the power components, check if intended voltages are present at the unmounted IC pins, followed by micro-controllers and then sensors.
Software development
Now your board is up! Start developing the software. You may want to start the software development on EVMs or reference boards. Be careful while porting software from one board to another.
Testing
One of the most important parts of the design cycle is testing or Design Verification (DV). If you are a consumer company, this becomes extra important for you. You should make sure your product works without any bugs.
There are many DV approaches. Any approach will work, but make sure you have a detailed test plan and all tests are performed. Some physical tests like the drop test, over temperature, and short circuit at output also need to be included.
In Conclusion
Here are some last steps to complete before design closure –
Manufacturing
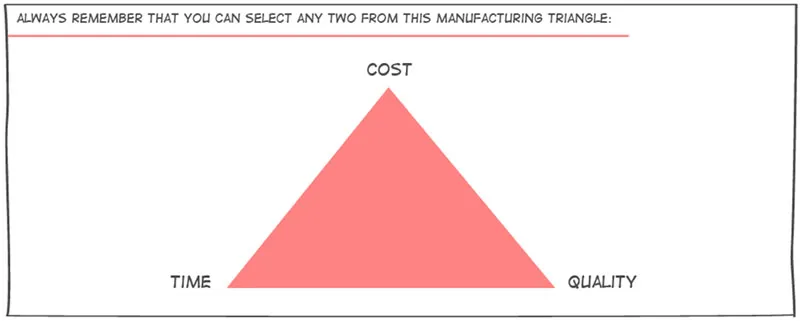
Here are some helpful tips –
- Avoid injection molding till you establish market (use options such as 3dpd.net and protolabs).
- If you’re working with a Chinese manufacturer, get your quote in Chinese currency (yuan).
- Set up a quality process for manufacturing and ensure that all parts go through this check. Here is where you define your maximum failure rate.
- Manufacture a pilot set (in the quantity range of ~100) before mass manufacturing.
- Ensure that you plan for the long IC component lead time (six to eight weeks).
- Get multiple quotes for everything so you also have a supplier backup.


