Tutorial: Deploying WordPress on AWS Elastic Beanstalk and Amazon RDS - Part 1/3
AWS Elastic Beanstalk is the PaaS layer on top of various AWS building block services. It is primarily meant to abstract the nuts and bolts of AWS to provide an abstraction for developers to deploy applications on the AWS Cloud. Developers who are familiar with other PaaS offerings like Google App Engine, Heroku, Cloud Foundry or RedHat OpenShift will find Amazon Elastic Beanstalk familiar.
Recently Amazon has added the support of PHP and now developers can perform a git push to easily deploy PHP web applications. This brings AWS Elastic Beanstalk at par with other PaaS offerings. This tutorial walks you through the process of deploying WordPress on AWS Elastic Beanstalk. This assumes that you have a setup of WordPress locally on your development machine.
Prerequisites –
- Running setup of WordPress
- Active account with Amazon Web Services
- Git version control system
- MySQL Workbench
- AWS Elastic Beanstalk command line tool
Step 1 – Create a local git repository and initialize the AWS Dev Tools
Navigate to the local WordPress directory and run the following command to initialize the git repository
[crayon lang="shell"]
git init .
[/crayon]
Now, run the AWS DevTools from the Elastic Beanstalk command line tool download
[crayon lang="shell"]
AWSDevTools-RepositorySetup.sh
[/crayon]
Run the following command to add a new repository to git and commit the changes
[crayon lang="shell"]
git add .
git commit -m "first check-in"
[/crayon]
The above command will show how many files are changed and inserted into the repository
938 files changed, 240726 insertions(+)
Now the local environment is almost setup for us to deploy the application to AWS Elastic Beanstalk. In the next step, we will create a new PHP application on AWS Elastic Beanstalk that will act as a placeholder for our WordPress blog.
Step 2 – Creating and configuring Amazon Elastic Beanstalk Environment
Log into AWS Management Console and Select the AWS Elastic Beanstalk tab
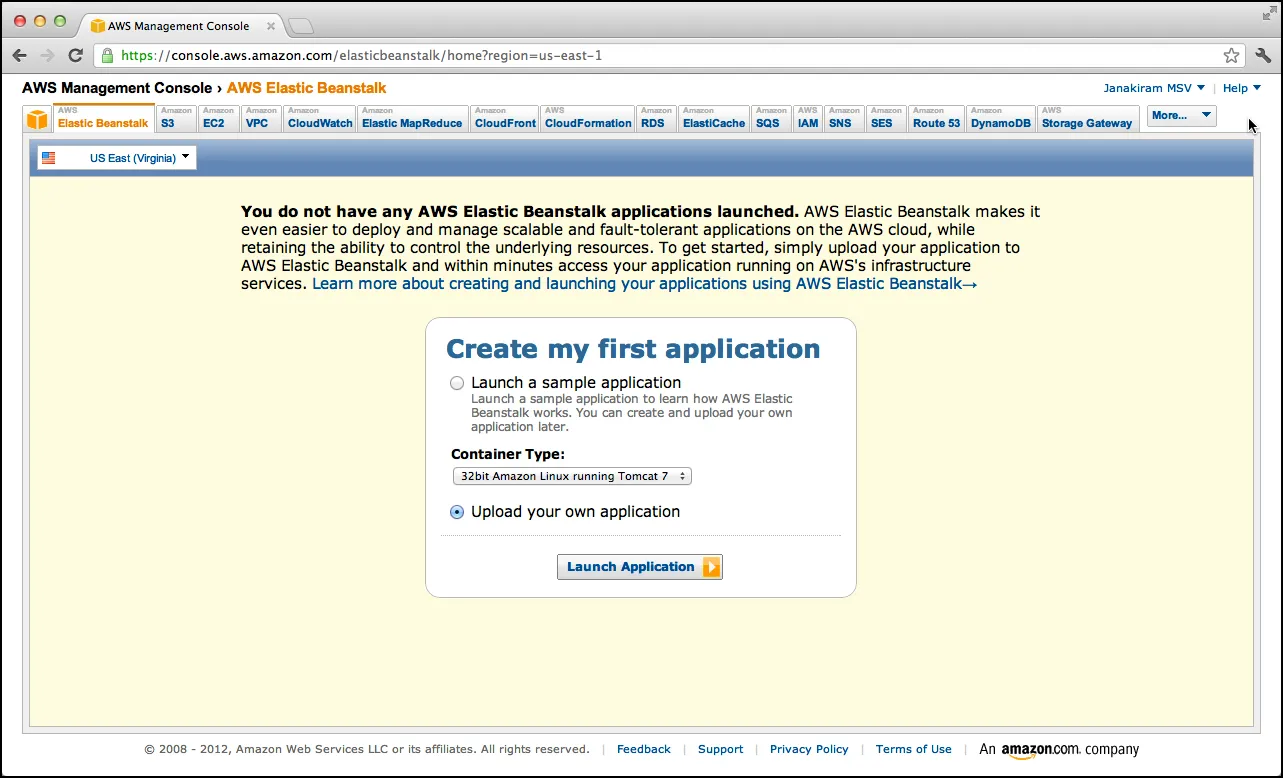
Select Upload your own application and click on the Launch Application button
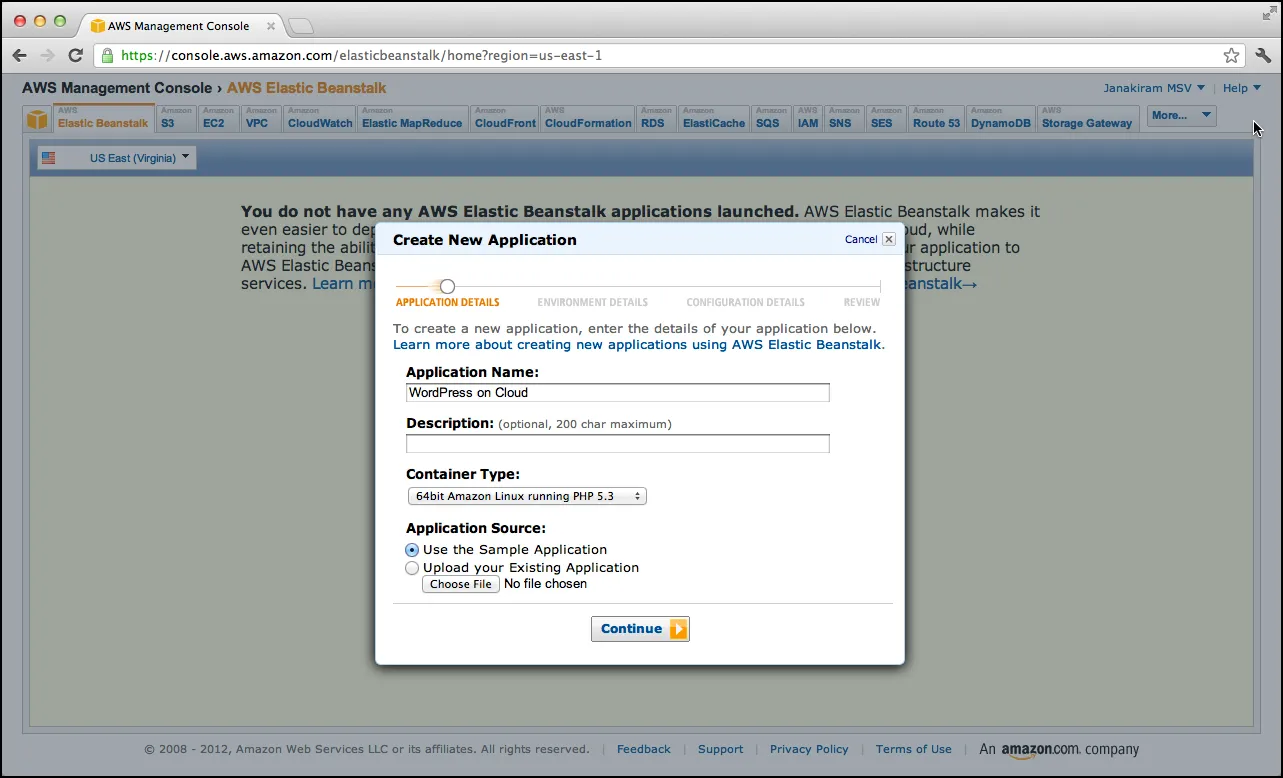
Provide a name to the application and select 64bit Amazon Linux running PHP 5.3. Click on Continue.
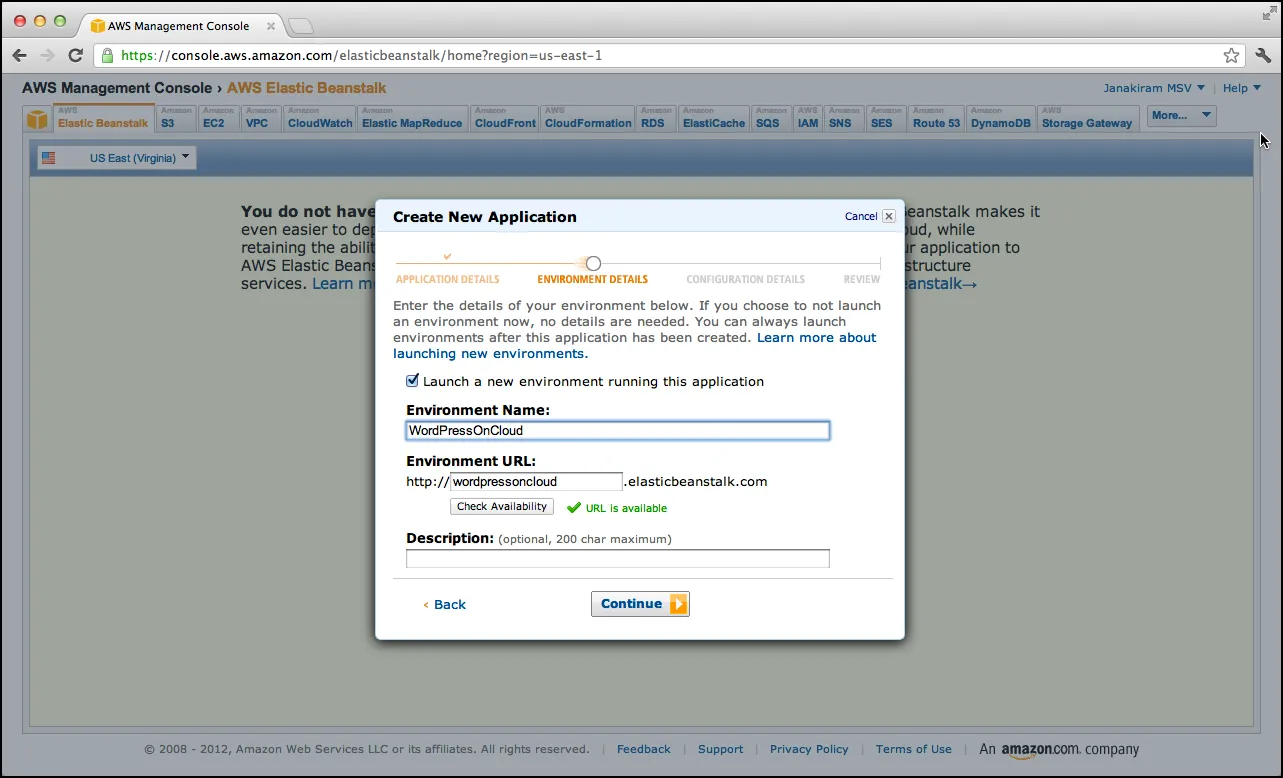
Provide an environment name and click on Continue.
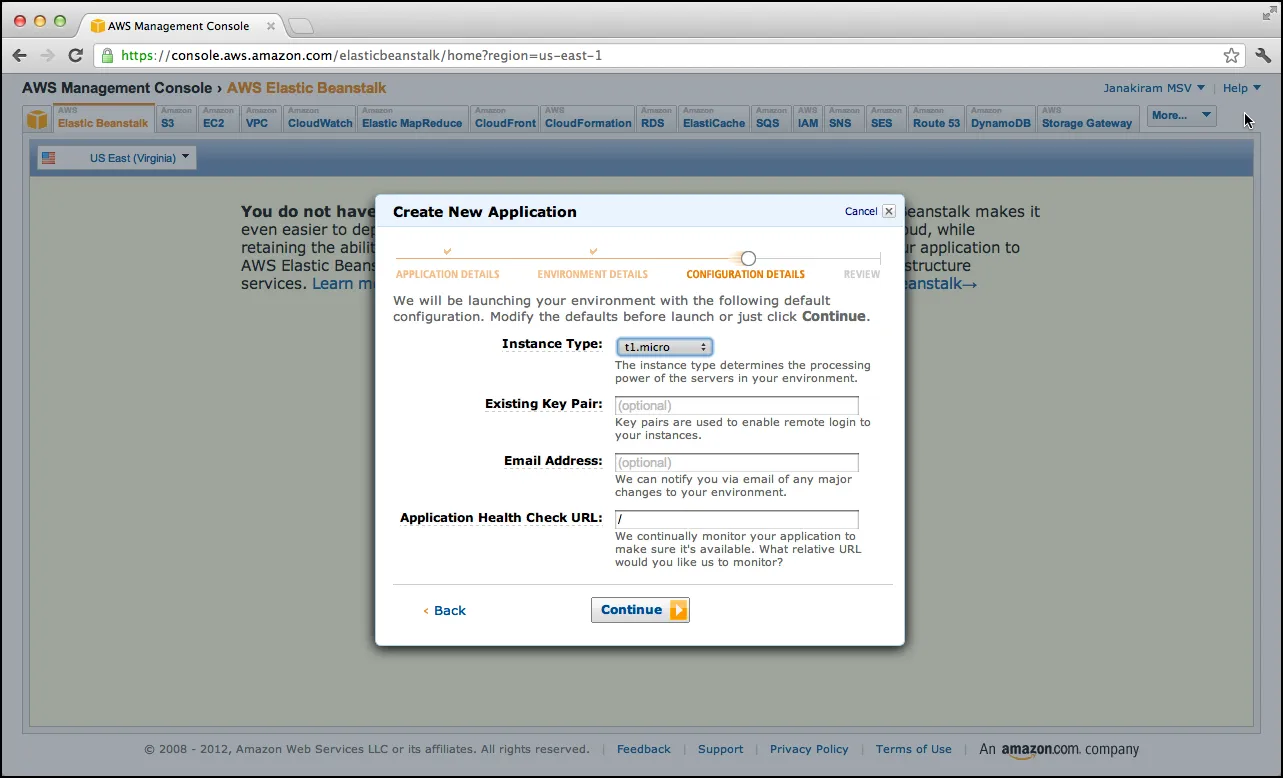
Select t1.micro for the instance type and click on continue.
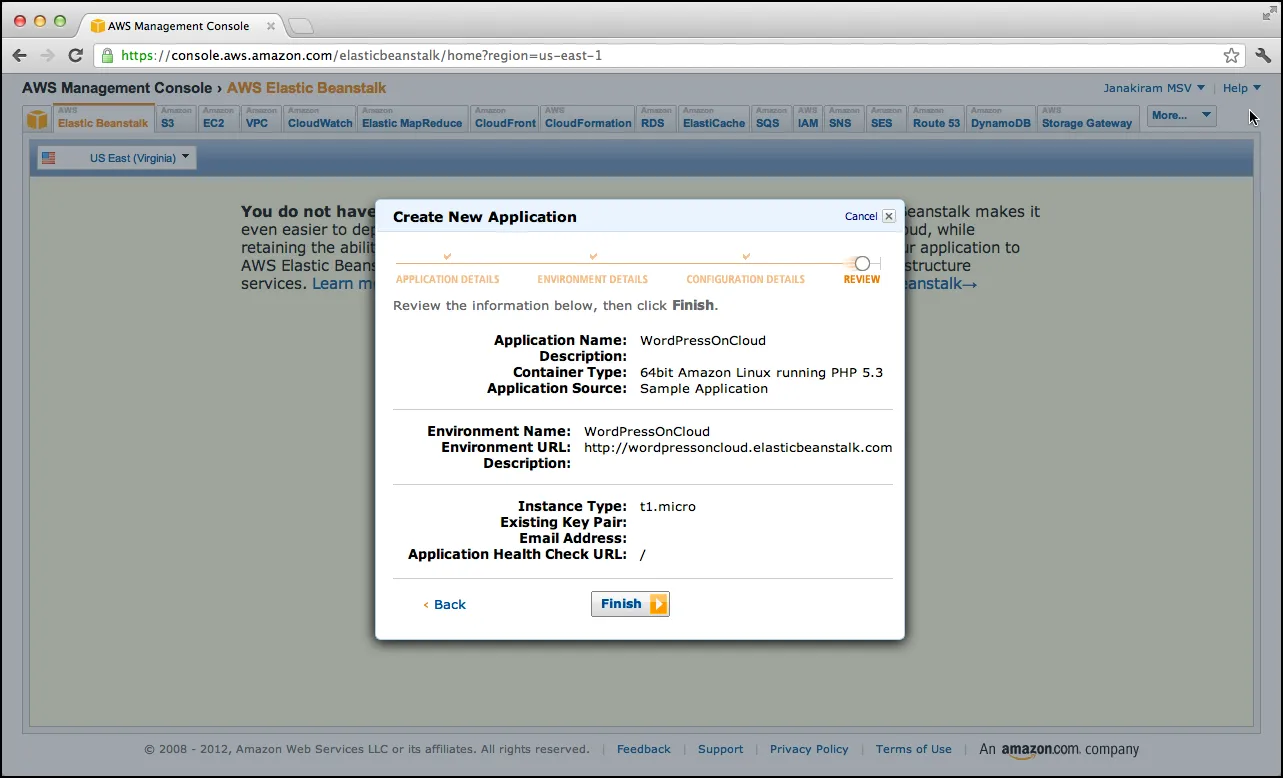
Review the changes and click on Finish. You should see the following message.
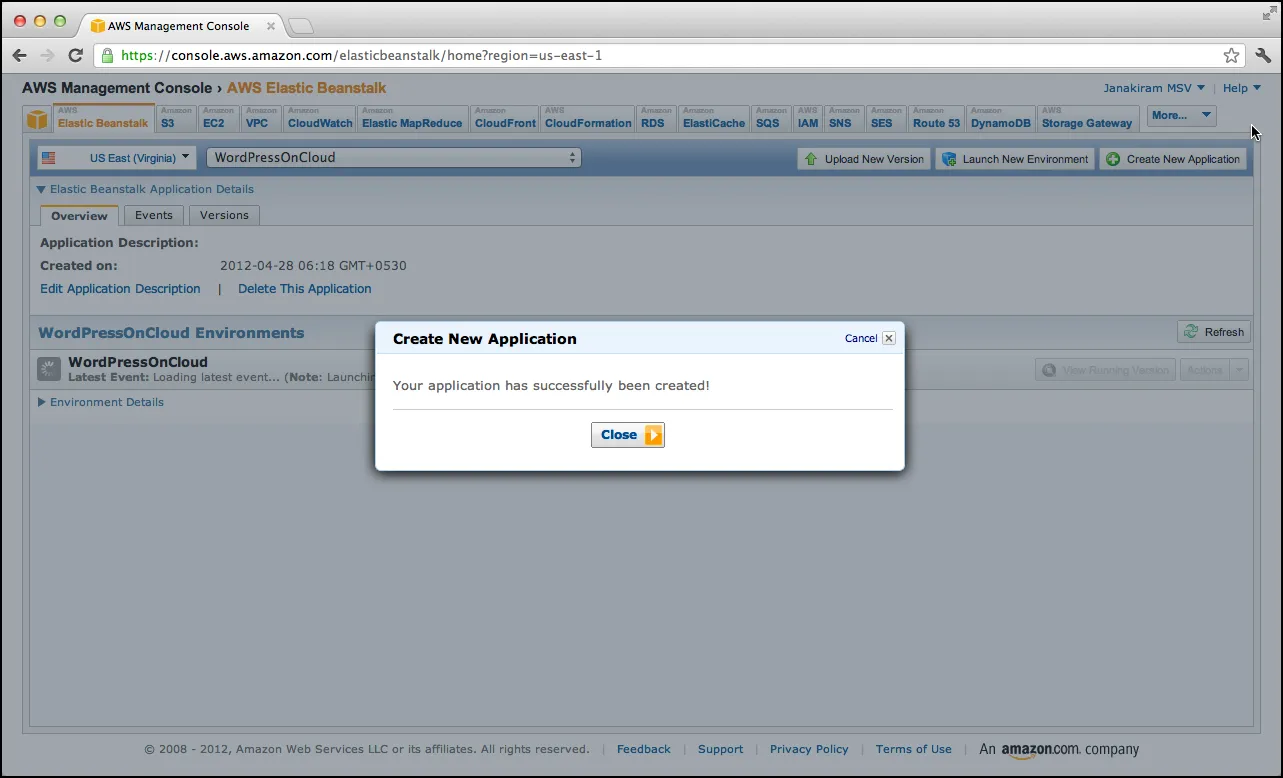
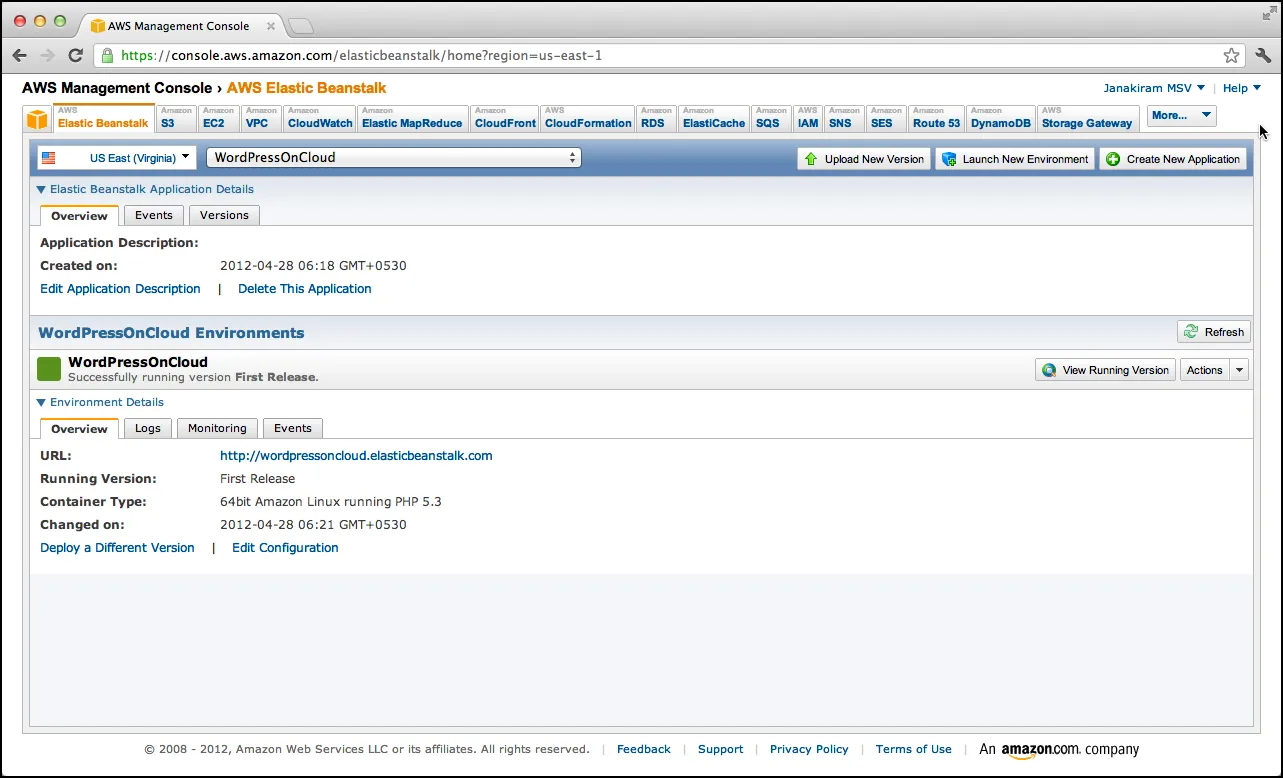
After a while, you should see that the application has been successfully configured and is accessible at a URL.
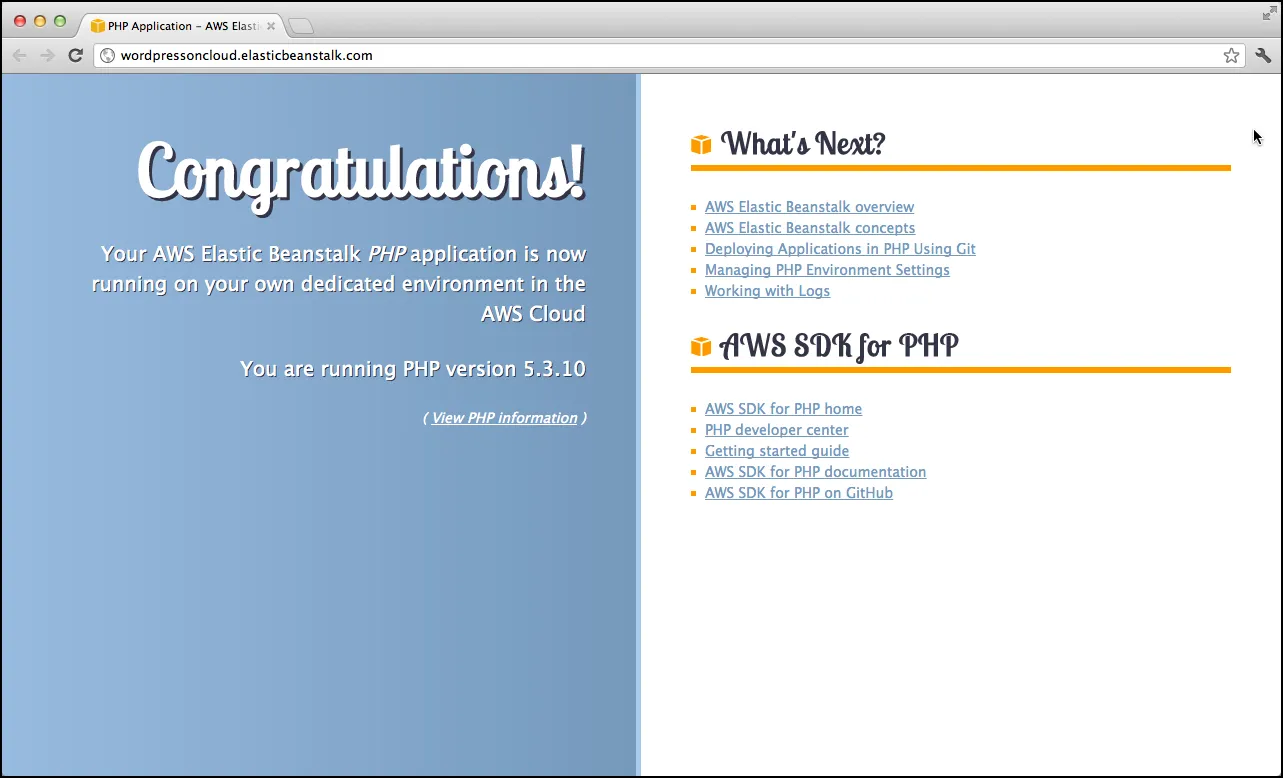
Clicking on the URL should show you the sample application that acts as the placeholder for our WordPress deployment.
In this part of the tutorial, we configured git on our local machine and configured AWS Elastic Beanstalk PHP environment to deploy WordPress. In the next part, we will configure the MySQL database on RDS. Stay Tuned!
- Janakiram MSV, Chief Editor, CloudStory.in


