

Tutorial: Deploying WordPress on AWS Elastic Beanstalk and Amazon RDS - Part 2/3
Tuesday May 15, 2012 , 2 min Read

In part 1 of this tutorial, we configured git and the AWS Elastic Beanstalk environment to deploy WordPress. Part 2 will focus on configuring the MySQL database on Amazon RDS.
Step 3 – Creating a MySQL Database in Amazon RDS
Login to AWS Management Console and select Amazon RDS

Select Launch DB Instance
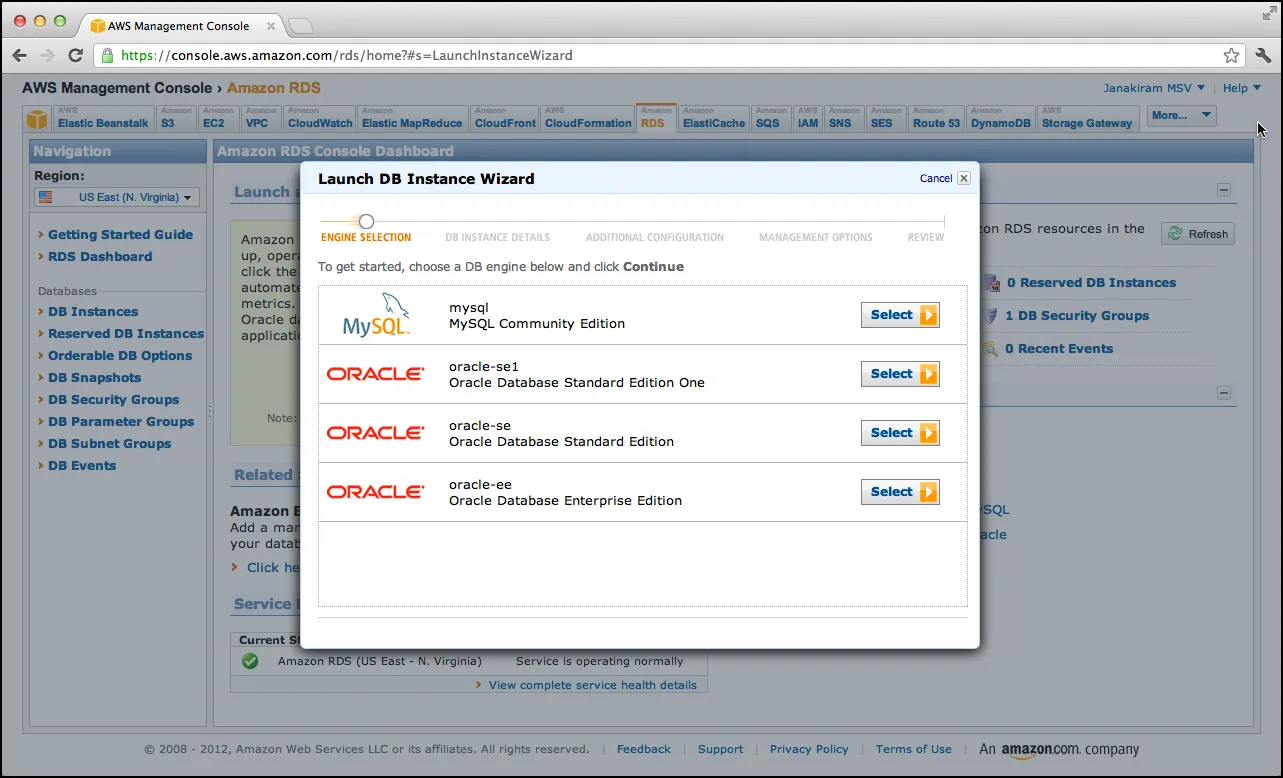
Select the MySQL database and click on select
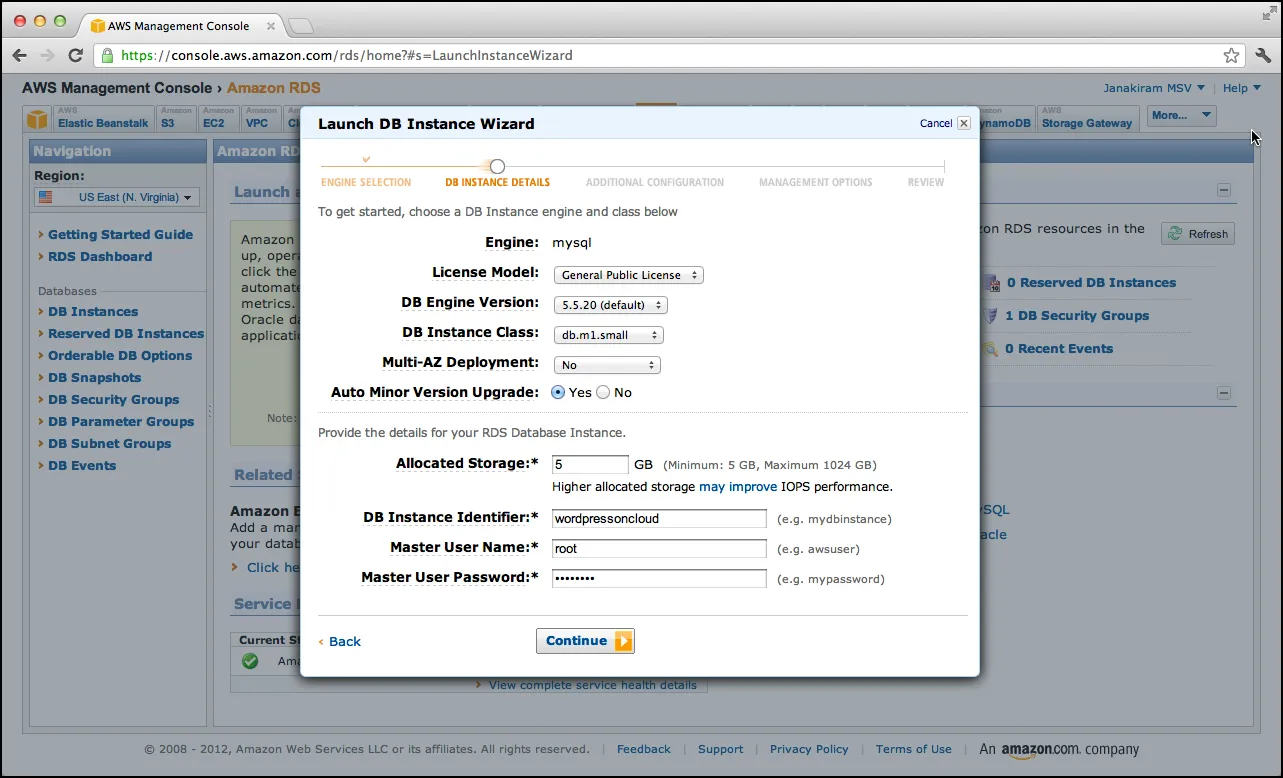
Choose the default version of MySQL DB Engine Version, db.m1.small for DB Instance Class and No for Multi-AZ Deployment. Choose 5GB as allocated storage and provide an identifier, username and password for the database instance.
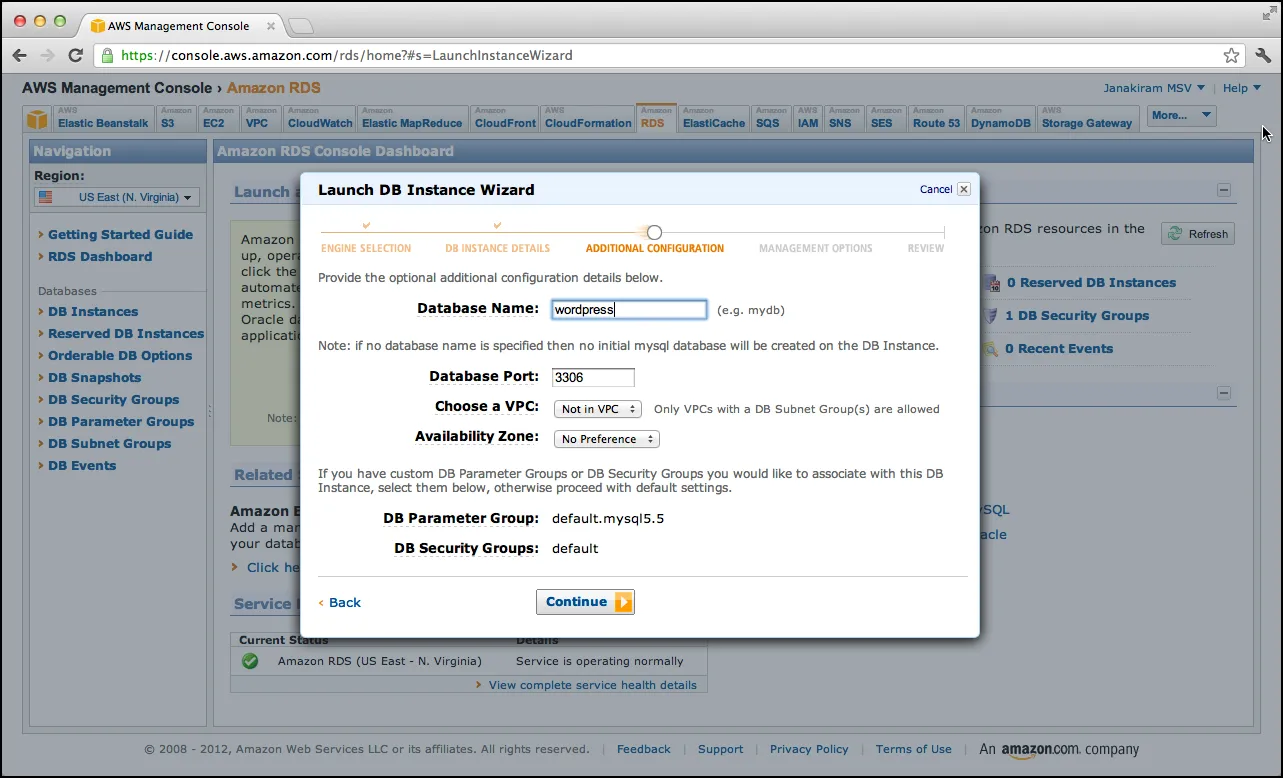
Choose wordpress as the database name and click on continue.
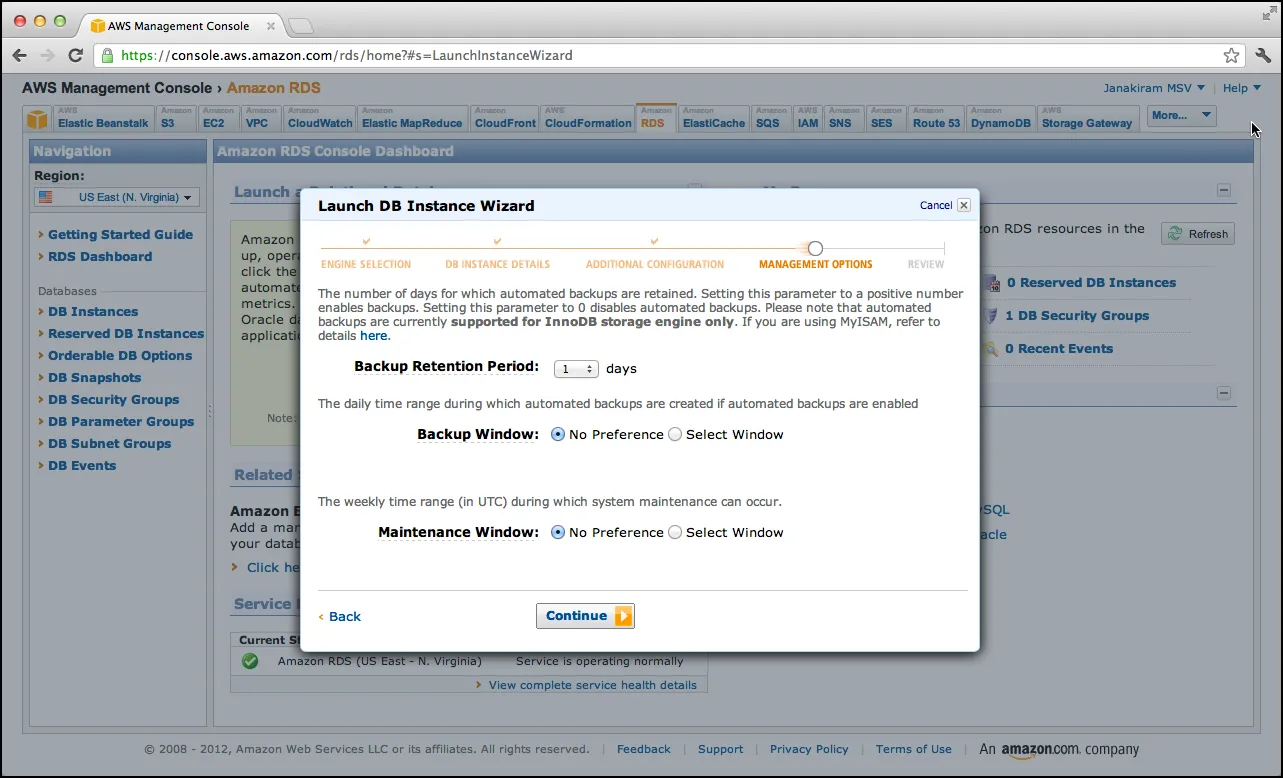
Leave the defaults and click on continue.
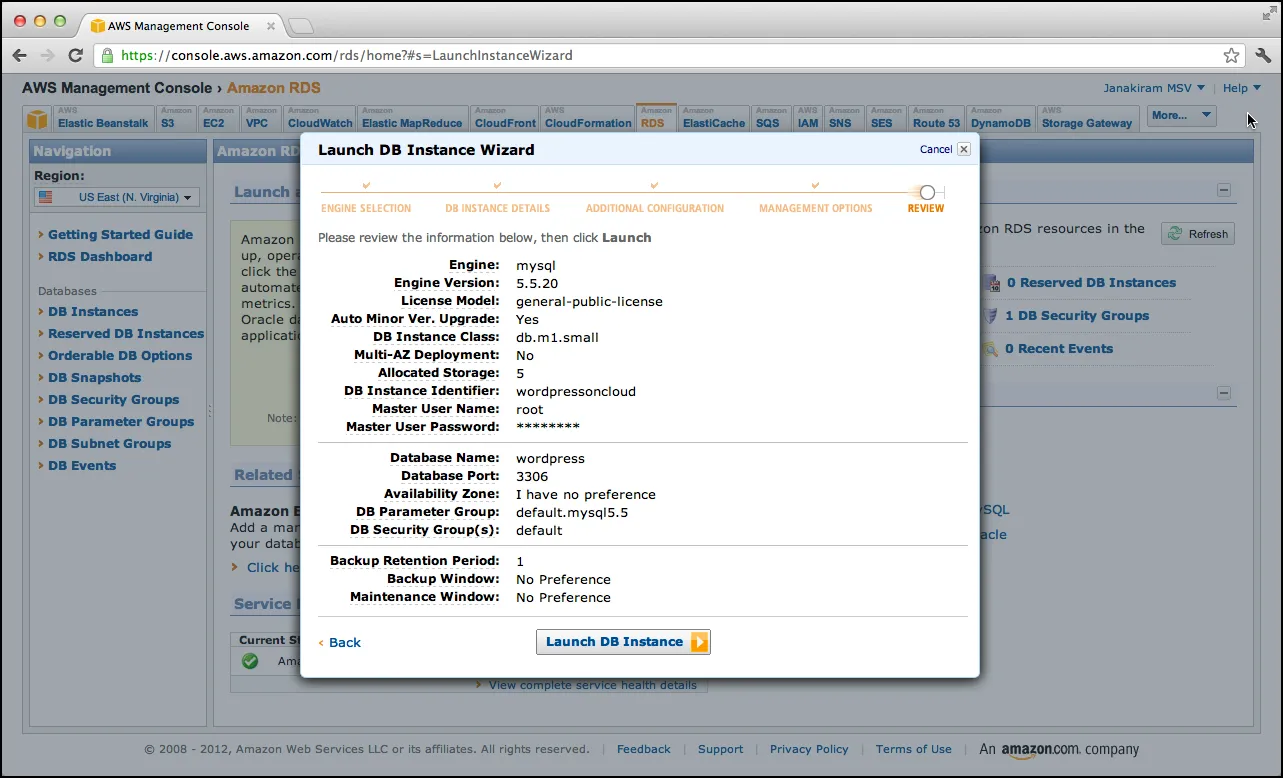
Review the configuration and click on launch DB instance.
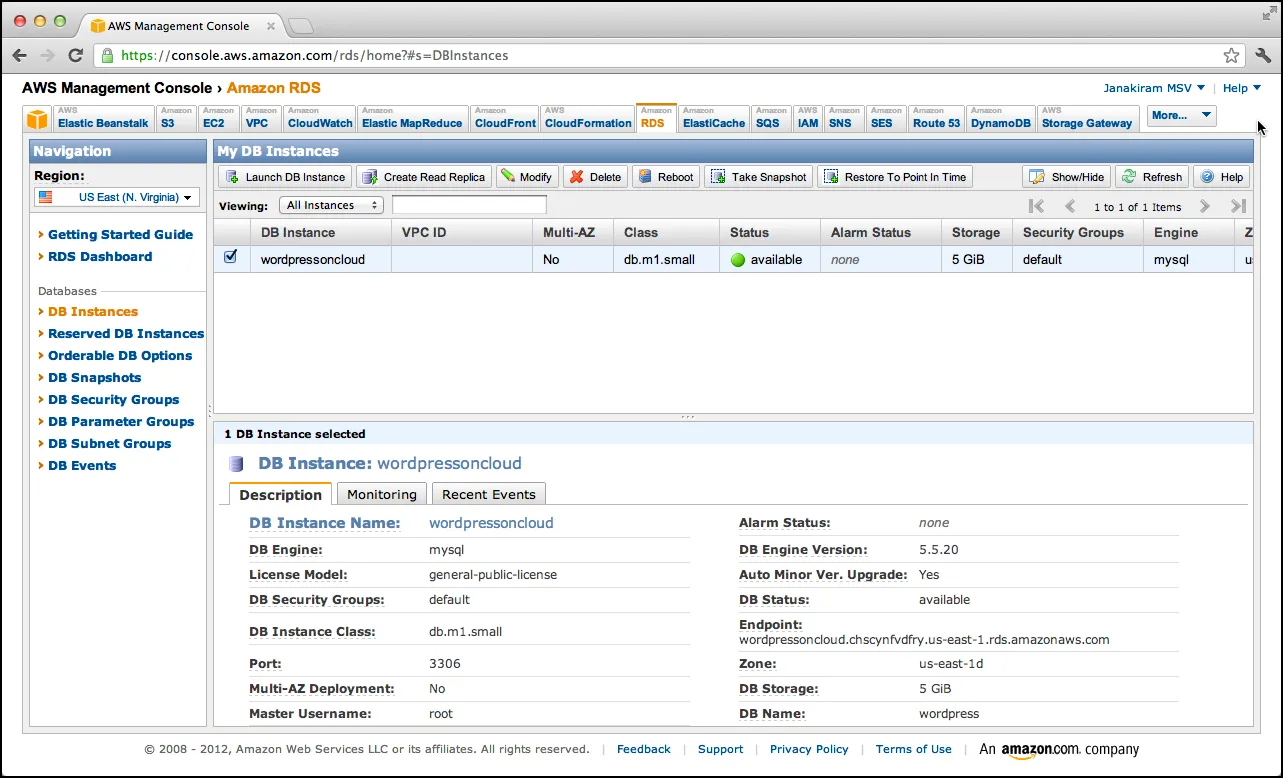
After a while, the DB instance should be available. Make a note of the Endpoint which will be included in the WordPress configuration at
a later point.
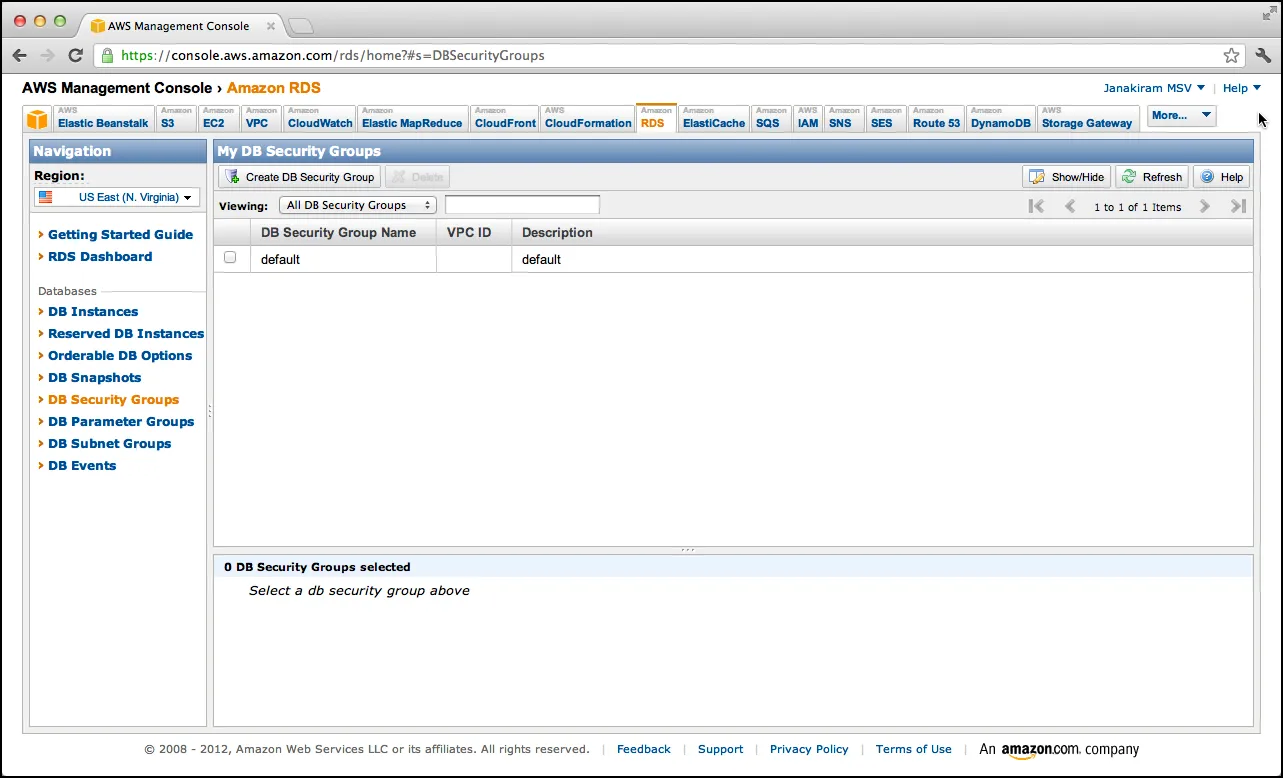
Click on the DB Security Groups in the left navigation pane and click on Create DB Security Group
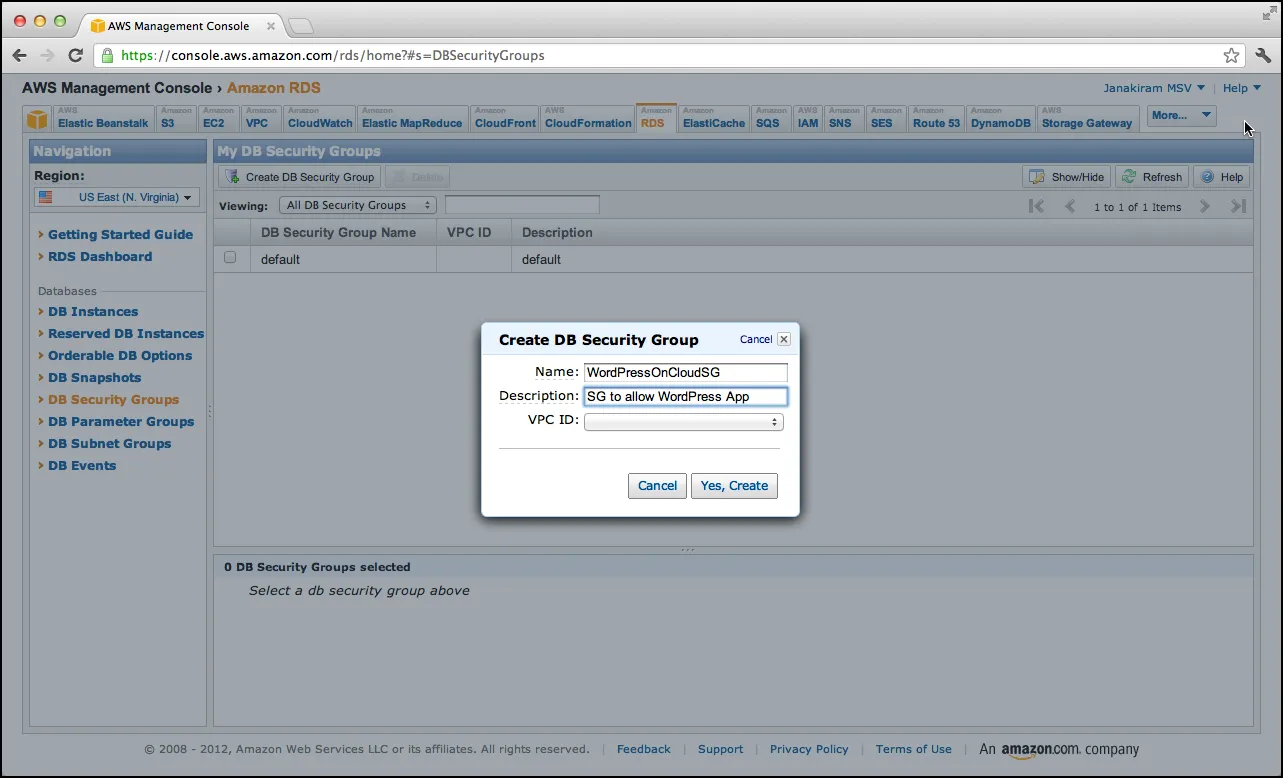
Provide a name and description and click on Yes, Create.
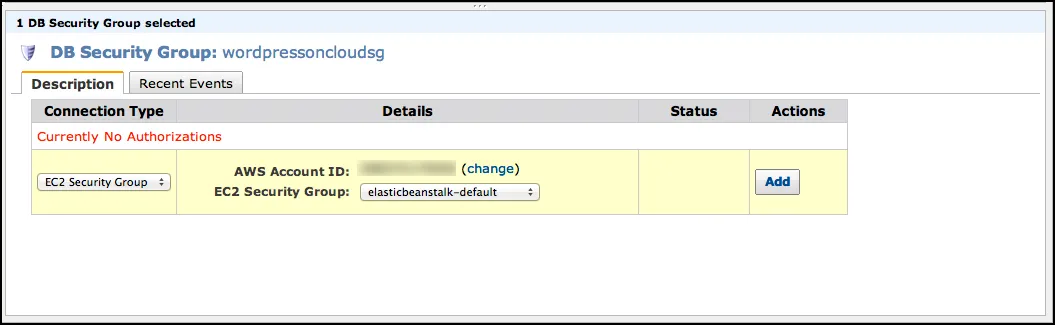
Select EC2 Security Group in the Connection Type and elasticbeanstalk-default in Details and click on Add. This setting allows the requests originating from the AWS Beanstalk applications.
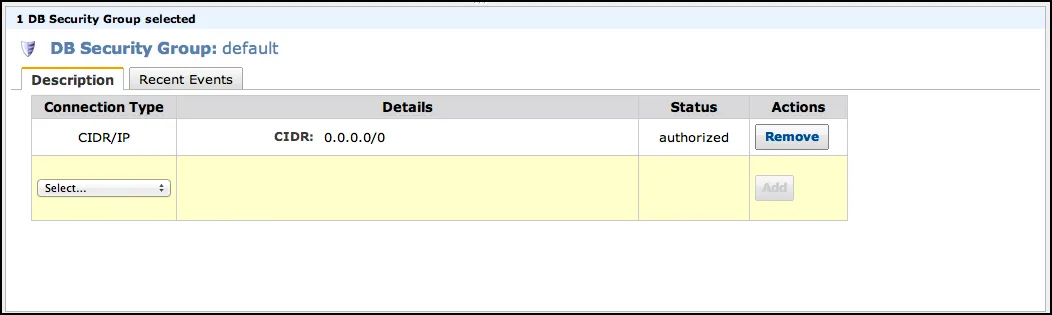
We will also add a security group to allow traffic from any machine. This is to allow us to import the database one time. After this operation, don’t forget to revoke this group.
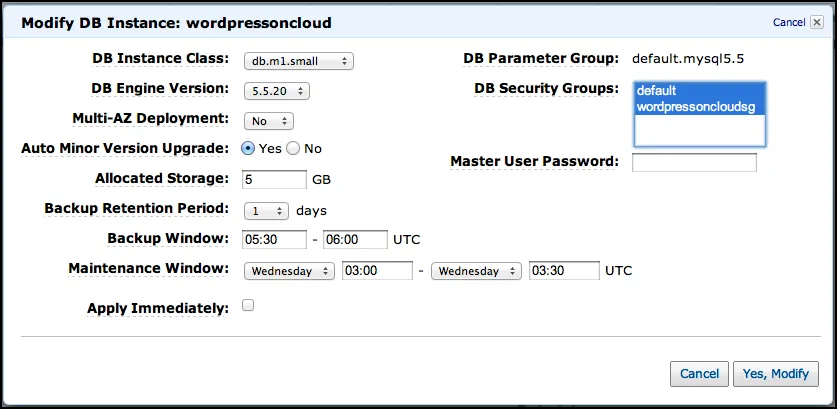
Click on the Modify button and associate both the security groups with the DB instance.
We created the MySQL database on Amazon RDS for the WordPress deployment. In the next and the last part of this tutorial, we will import the database and deploy WordPress AWS Elastic Beanstalk. Stay tuned!
- Janakiram MSV, Chief Editor, CloudStory.in