
Enable Multifactor Authentication in Office 365 Account
I will discuss how to enable multifactor authentication in office 365 mailbox using the Exchange admin console. MFA is an extra layer of security to secure Office 365 account.

Azure is a method of MFA to identify who you are, and most of the users use it for advance security. By using MFA for Office 365 account, we get a second access to logging in to verify that the person logged in is a person authorized or not. For this, he either confirms to a one time password, phone call or message. Only after satisfying its verification, that office can sign in 365 accounts.
Enable the multi-factor authentication in the Office 365 admin account
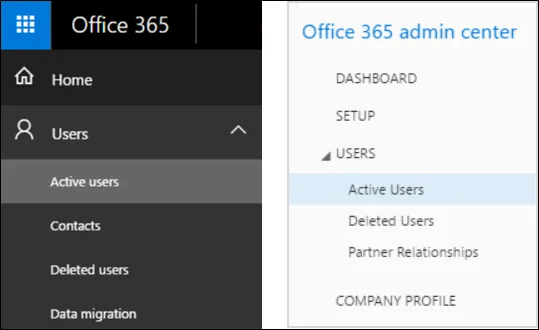
You must first log in to Office 365 account, then a Microsoft Office home window will appear. From the Office 365 Home window, a lot of options will appear, from which click Admin Option.
After clicking admin option, a new window will open for the admin center. The user will click on the left side of the screen then found a dropdown list. Select active users by going to that list.
After selecting the active user, you will see a second screen. From where we have to select the more button. After clicking more button >> choose the Azure Multifactor Authentication set
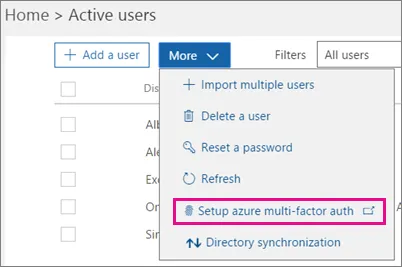
Once Azure Multifactor Authentication is selected, a new window will appear on the screen. All users are displayed in that window with MFA status.
If you want to enable MFA, then you can do it in two ways -
1. One by one
2. Bulk update
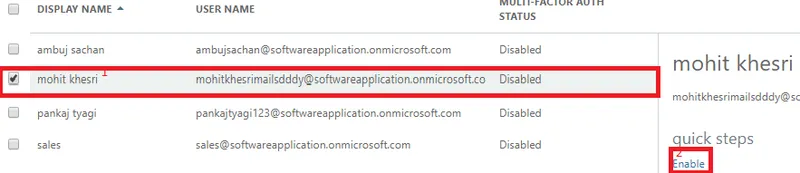
By selecting the user one by one
If you want activate MFA in single user at a time, then you need to tick the mailbox. And then enable option to set-up multifactor authentication
After completing the process, log in to your 365 account again. Here, you will need to fill some required information such as mobile number, OTP and required to validate it. At last, multifactor authentication will be started automatically.

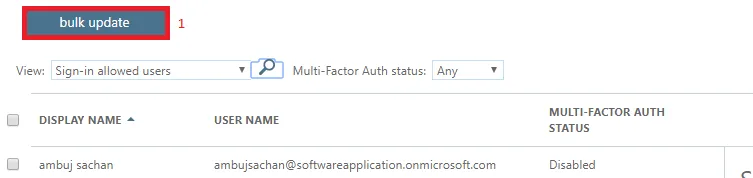
Using the bulk update option
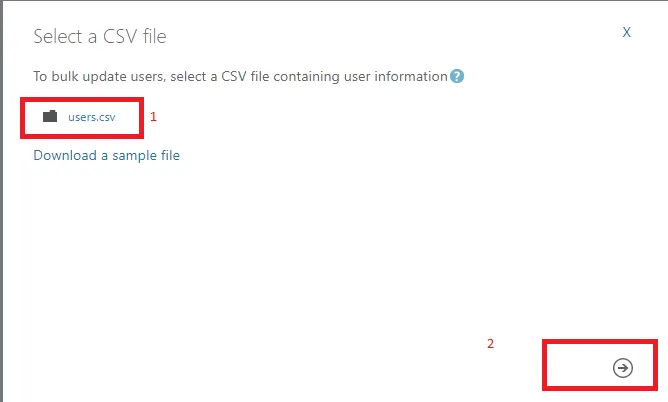
To activate MFA in bulk, you have to create a CSV file with user name or MFA status.
To create a CSV file, you need to open Microsoft Excel or Notepad and type the following information.
Username & MFA Status
Once CSV file is created, Click on bulk update button and browse the CSV that you have created, then go to the arrow and click on the arrow again. Multifactor authentication will be started automatically after this process.
Conclusion: I have explained how do I set up an MFA in Office 365. If you have any query related to this article then feel free to comment